
This post is also available in:
A common method is to deploy the email signature to the employee and attach a tutorial with step-by-step instructions for them to paste the signature into their own email account. This process can take hours for only one employee, and it’s only if everything goes well.
If you need to make future changes, such as adding a new phone number, the whole process needs to be restarted. You’ll spend a huge amount of time, and time is money. It could also go wrong, since this series of steps offers many opportunities for error:
- The employee pasted the wrong signature;
- You’ll have to access the employee’s machine;
- The signature area on the email client was not found;
- The email signature is not displayed correctly when sending a new message;
- For some reason, the employee did not make the requested change;
The good news is that you now have better alternatives to update your email signatures without sending tedious tutorials or accessing the employee’s machine in person.
Key takeaways
- Updating email signatures can be tedious and error-prone, but alternatives exist for Google Workspace email signature management.
- Bybrand simplifies the process by allowing remote updates of email signatures for employees using Gmail.
- To standardize email signatures, create a Bybrand account, activate integration with Google Workspace, and set up group.
- Using the Automation feature, you can associate standard email signatures with groups and automate user information insertion.
- Bulk updates save time when updating signatures for multiple employees, enhancing efficiency for businesses.
Table of contents
Today, we will take a look at a complete guide for creating and implementing email signatures for Google Workspace (Gmail users).
This guide will be your savior.
Why should you use a professional signature on Gmail?
There are many reasons why you may want to use a standard email signature for all employees, but the main reason for most companies is to strengthen their brand. Usually, a signature carries the company logo.
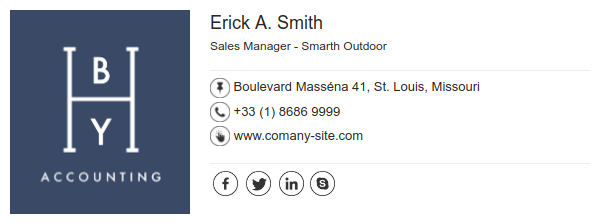
With our example above, we can also complement it with more visits to the company’s website and an increased number of followers and likes on social networks.
About integration Bybrand + Google Workspace
Google Workspace provides productivity tools for over 8 million companies worldwide, with Gmail as its primary corporate email solution.
If your users rely on Gmail for daily communication, you’ve likely considered how to standardize email signatures easily.
Bybrand enables remote signature updates. With employees working from various locations, Bybrand eliminates manual work—allowing signature changes across any account with just a few clicks.
How can you standardize email signatures?
You are determined to standardize the email signatures of all Google Workspace users who use Gmail. But now, how do you do it?
Keep reading…
The following steps will guide you through all the phases. However, you can also watch a quick 6-minute presentation of this same guide below.
Phase #1 Creating an email signature
The first step is to create a Bybrand account. If you already have an account, you can skip this step.
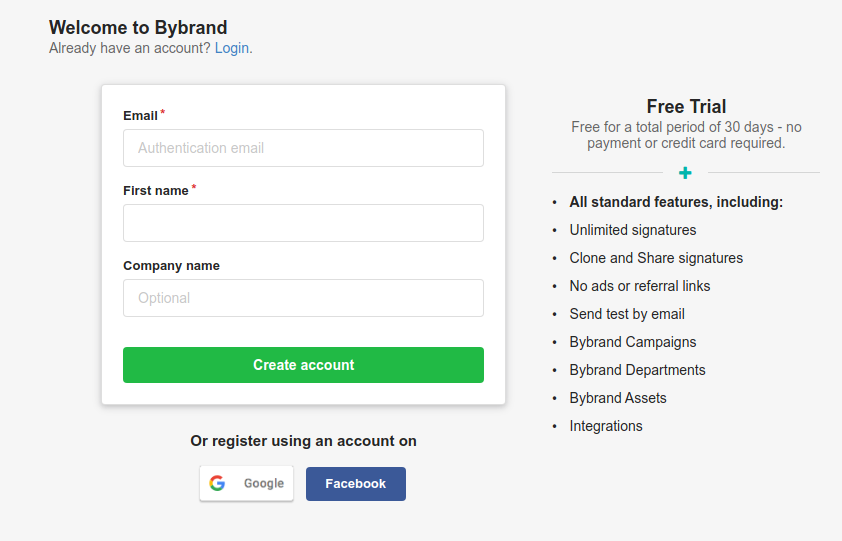
All done? The next step is to create your first email signature.
Bybrand has a gallery with good professional templates. However, you do not need to be limited to the premade fields of the template. You can add any text element, images, or icons in any part of your signature.
For our guide, let’s choose this template:

We only changed a few things, such as the company logo and the icon of the physical address.
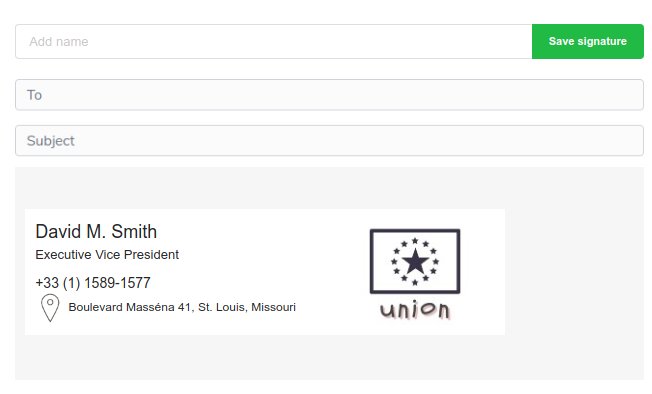
Then, click Save to create the first HTML signature.
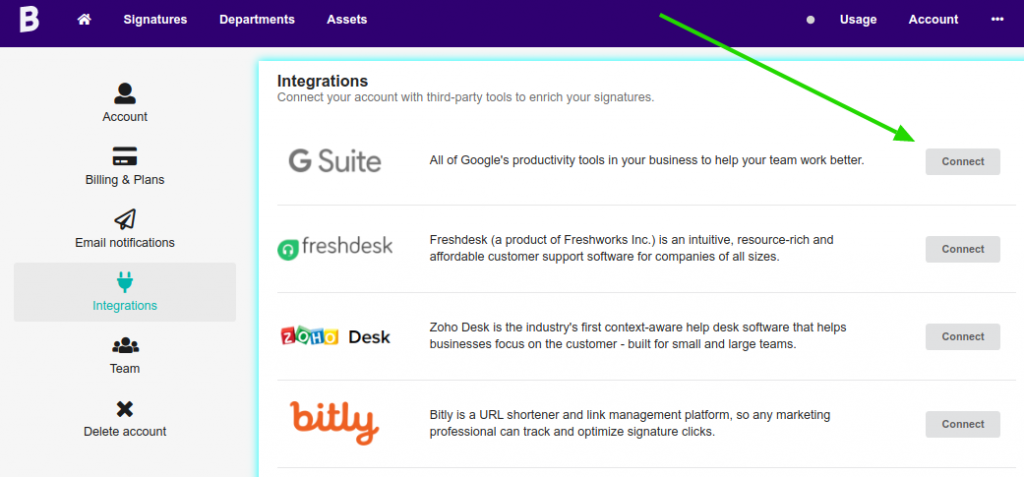
Phase #2 Activating Integration
Now comes the most interesting part: to activate the Bybrand integration with Google Workspace. Visit the Integrations area and then activate G Workspace.
Related:
Click on the Add menu and then add your administrator’s email address along with the domain of your organization.
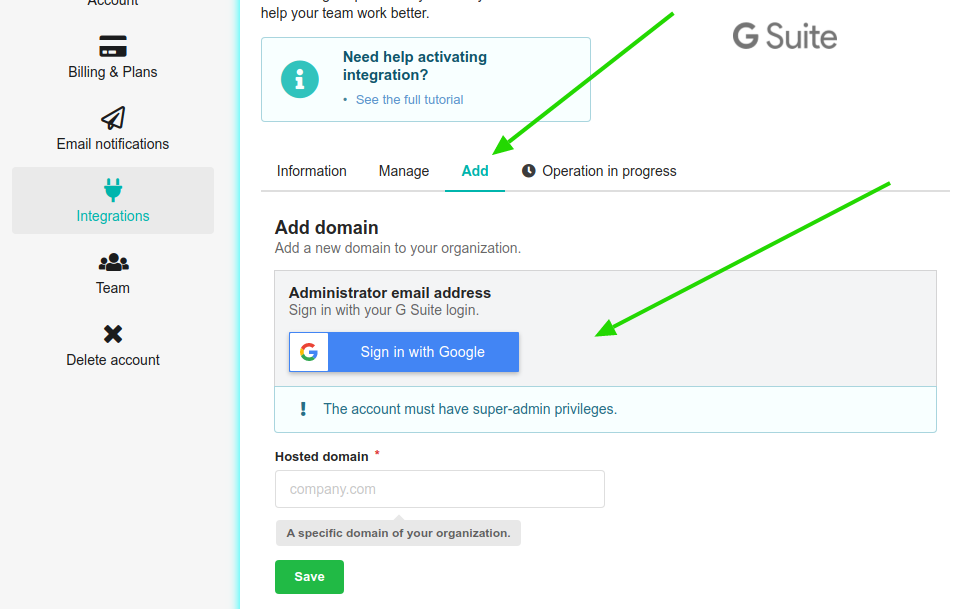
At the end, you’ll see a screen similar to this one:
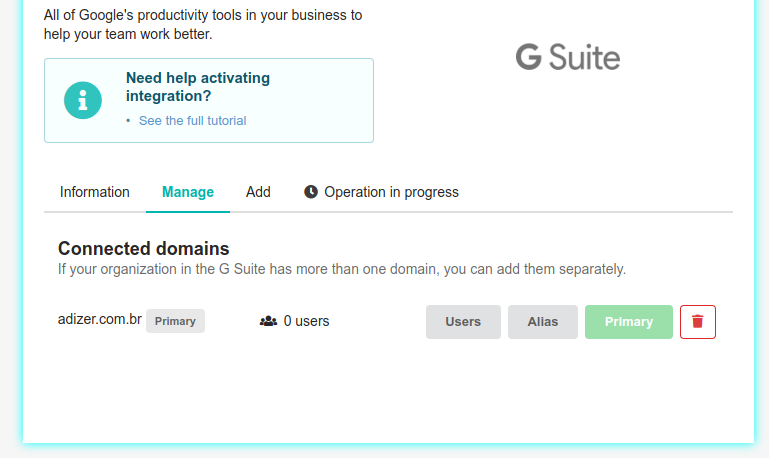
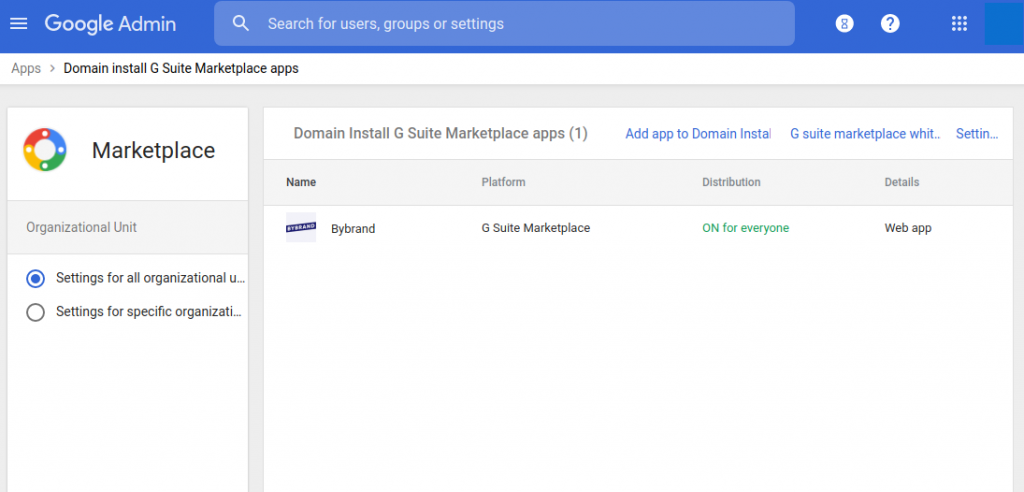
The Google Workspace integration with Bybrand is complete. Now, you need to enable the Bybrand app in your Google Workspace Marketplace.
This step is effortless to complete. To help you, we have this quick video tutorial covering every step.
Related links:
In the end, the Bybrand app must be listed like this example:
Back to Bybrand, we will load users to make sure everything is working.
If your account has shown success, it means it is working. In our example, 4 Workspace users were loaded.
Phase #3 Creation of the group
To save some time creating and implementing professional email signatures for employees, we will use the Automation feature. This feature will automatically generate signatures for users imported from Workspace.
First, let’s create a standard group for this guide. In the future, you can create sectors, such as Marketing or Sales, to have a different signature for each one.
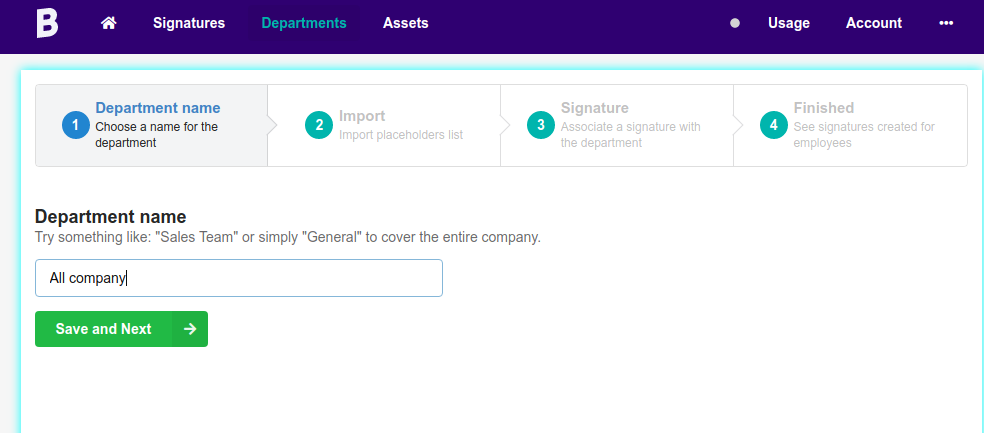
Proceed to the next step by clicking the Save and Next button.
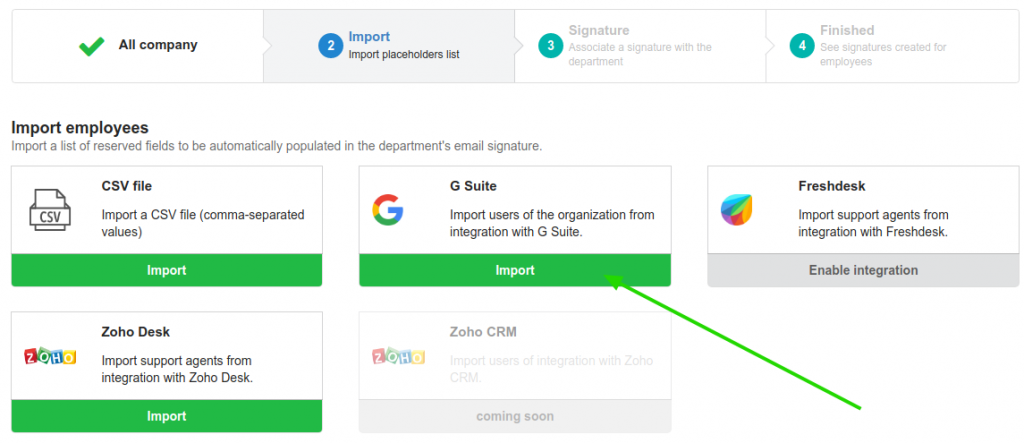
The next step is to import Workspace users. Click on the import from Google Workspace (G Suite) option that will be active.
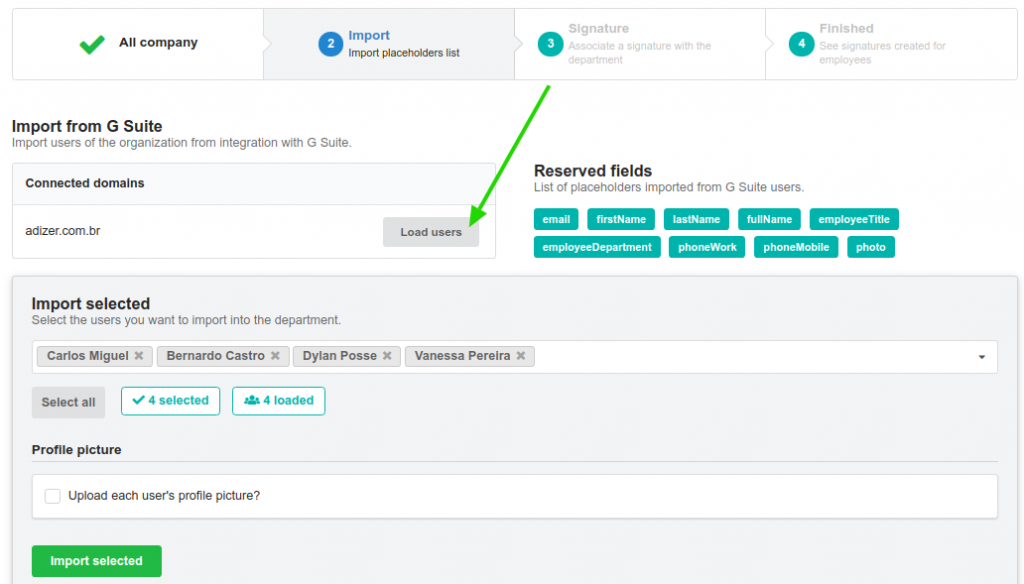
In the next step, click on Load users and select the users you want to import to this new group of yours. In our case, we will use the option to import all.
Now, let’s associate an email signature for this group. Remember that we created a signature at the beginning of this guide? Here it is.
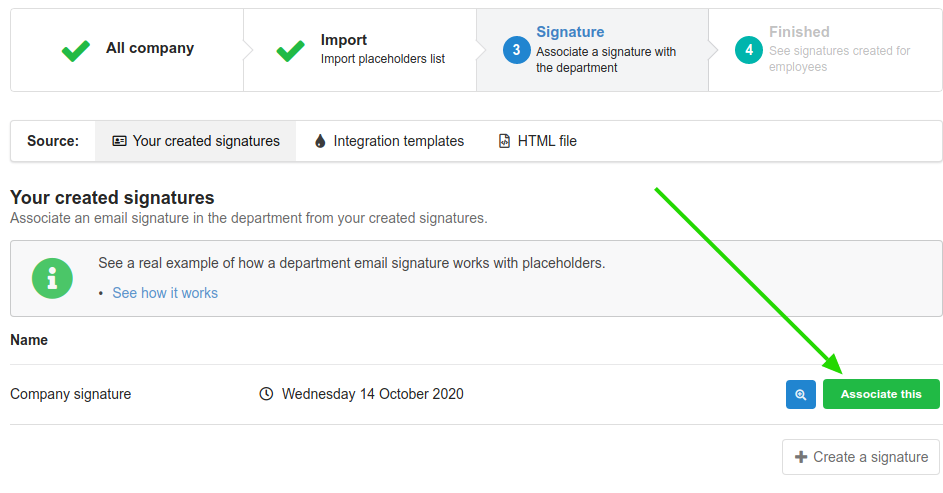
Click on Associate this, for the group to be created for imported users.
We are almost done now.
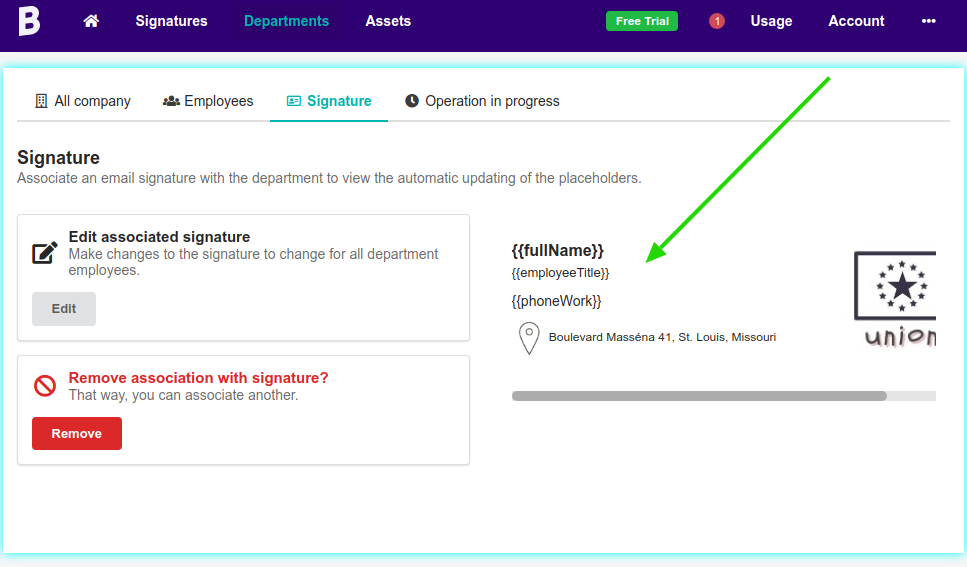
Our email signature associated with the group does not have the placeholders. We will need to add the group placeholders in the email signature to upload each user’s information automatically.
Click on the Signature menu and then Edit the email signature associated.
Added the placeholders. Your signature needs to look like this example.
Related:
Do you notice that when viewing the signature, the reserved fields are being changed? This is the automatic signature creation for all users.
Phase #4 Updating user signatures in Gmail
The step of updating the signature remotely in the user’s email account was our goal from the beginning, and here we are. You can do this in two ways.
One is doing it individually, clicking on the Paste in email button.
That way, you’ll update only one signature at a time.
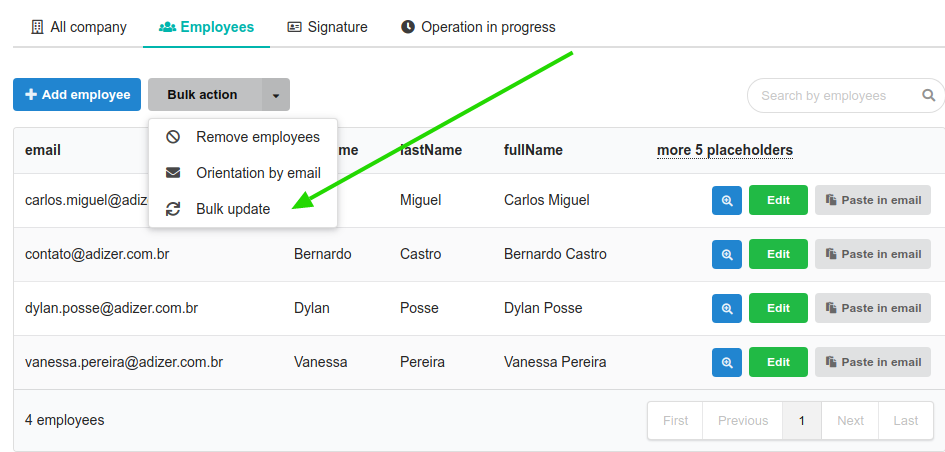
The other way is using a Bulk update, which will save you a lot of time, especially if your company has more than 50 employees.
Finishing
The phases of the creation and implementation of email signatures are relatively simple. The manual work from the first to the third step must be done only once. This way, if you need to create a Marketing group that needs to have different signatures, you don’t need to activate the integration again.
The fourth step covers updating signatures, where you can see the automated work happening, which is more rewarding. Therefore, email signature management should not stop after the first update is completed.
To avoid the manual tasks described at the beginning of the guide, we recommend activating the Bybrand + Google Workspace integration.
We developed the tool thinking about IT administrators and marketing professionals and realized that integrations increase efficiency and help optimize processes, making their daily tasks easier.

Create your first email signature with Bybrand
Bybrand offers the ability to generate, administer, and distribute essential email signatures for your employees.