
This post is also available in:
Streamline your email signature management by importing Google Workspace users into Bybrand’s Automation feature. This eliminates manual tasks, making the implementation of email signatures more efficient.
Activating Integration
Before importing users, ensure that Bybrand’s integration with Google Workspace is active. If not, follow the steps outlined in the Google Workspace Integration Guide.
Creating an automation group
Assuming you’ve just created an Automation group:
- Navigate to the import menu via integrations.
- With Google Workspace integration active, click Import.
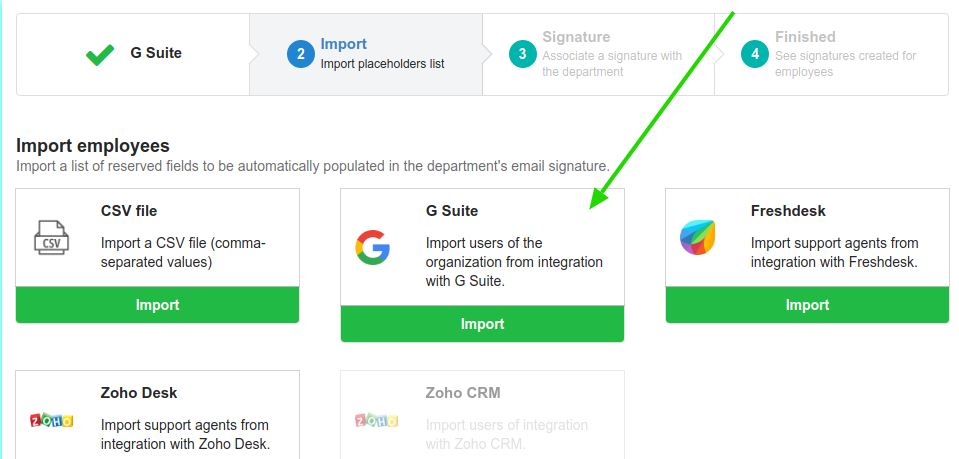
Note: If the integration isn’t active, you’ll receive a prompt to activate it. After activation, return to this page and proceed with the import.
Importing Google Workspace users
All available domains in your account will be displayed. You can load user information from your domain into the Automation group.
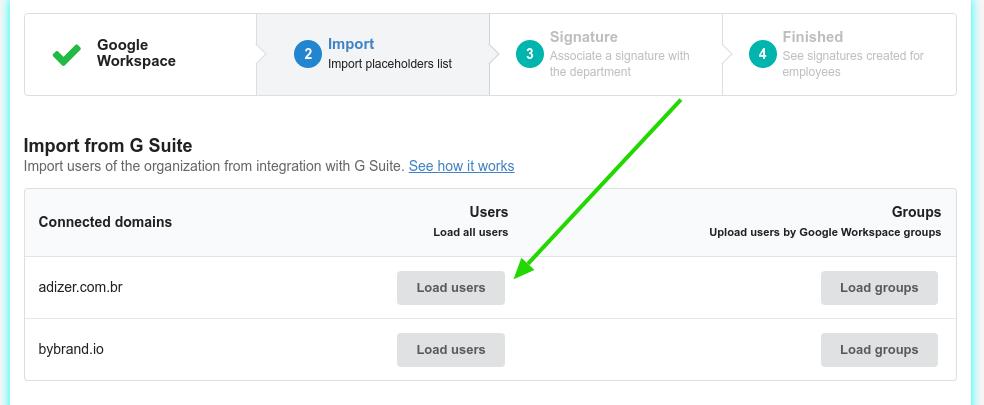
In the example above, clicking the Load users button will load (but not yet import) all users from the @adizer.com.br domain.
A selection box will then appear, allowing you to choose which users to add to the Automation group.
Placeholders
The following placeholders are imported and can be used in your HTML email signature:
- firstName
- lastName
- fullName
- employeeTitle
- employeeDepartment
- phoneWork
- phoneMobile
- addressWork
- photo
- employeeDescription (represents pronouns)
If a field lacks information, it’s added as empty. You can edit employee information at any time to add missing data.
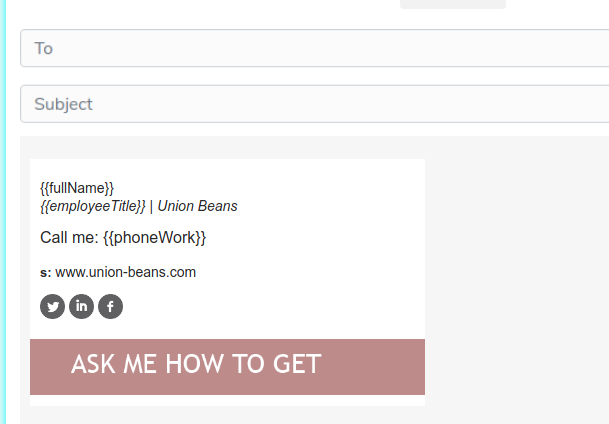
In the example above, placeholders like fullName, employeeTitle, and phoneWork are used.
User profile photo
Bybrand also imports the employee’s profile picture, if available. This allows you to use custom images in email signatures.
For more details on working with dynamic images in Automation signatures, refer to this video tutorial.
Imported images are also available in the Assets section
Related resources
Video tutorial
For a comprehensive walkthrough, watch the full video tutorial below:.
Note: The example video assumes an existing email signature with Automation placeholders. If you don’t have a signature, consider using a pre-created integration template.
If you encounter any difficulties, kindly utilize the side page to contact our support team.