
This post is also available in:
In this tutorial, you will learn how to create email signatures with user headshots using Bybrand and the images available in Google Directory.
As a Google Workspace administrator, you can manage user profile information, including the profile photo. Once these photos are correctly registered in the directory, Bybrand can use them to generate personalized email signatures for each employee.
To follow this step-by-step guide, you must have the Bybrand integration with Google Workspace active.
Before you start
Check if:
- The Google Workspace integration is already installed in your Bybrand account.
- Employees already have a profile photo registered in Google Directory.
- User profile photos have the correct viewing permissions.
- The email signature used in the group contains the photo placeholder.
- You have administrative permission to import Google Workspace users.
Video tutorial with the steps
Watch the video step-by-step guide to follow how to create email signatures with headshots using Google Directory data.
Steps
1. Access the Automation area
In the Bybrand dashboard, go to the Automation menu.
This area allows you to create employee groups and generate personalized signatures in bulk using data imported from Google Workspace.
Next, click to create a new group or select an existing one.
2. Import employees from Google Workspace
In the employee import step, select the Google Workspace integration.
You can import Google Directory users into the automation group. This data will be used to automatically fill in the signature placeholders, such as name, job title, department, phone, email, and profile photo.
To create signatures in bulk, select the desired users or import all available employees.
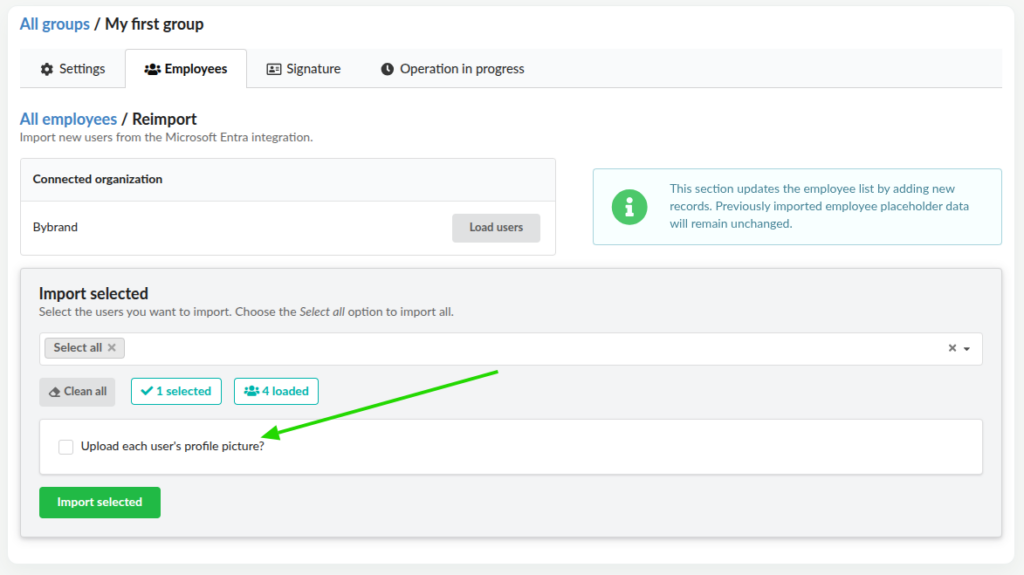
3. Enable profile photo upload
During the employee import, check the option to load each user’s profile photo.
This option allows Bybrand to attempt to fetch the headshot directly from Google Directory and associate that photo with the corresponding employee field within the automation.
4. Connect an email signature to the group
In the Signature step, connect an email signature to the employee group.
You can choose an existing signature, use a pre-created Bybrand template, or create an HTML signature.
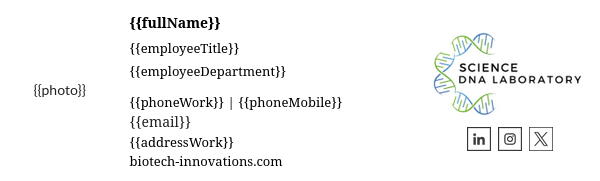
The most important point is that the signature template must contain the Google Workspace integration placeholders. These fields will be automatically replaced with each employee’s actual data.
Example of common fields:
{{fullName}}{{email}}{{employeeTitle}}{{phoneWork}}{{photo}}
Example of an email signature with a photo placeholder.
—
4.1. Adding the photo placeholder
If the signature template does not yet have the photo field, add the corresponding placeholder, such as:
{{photo}}
This placeholder will be responsible for displaying the employee’s headshot within the email signature.
5. Verify the result
After importing the employees and connecting the signature to the group, access the automation employee list.
Click on an employee to view the personalized signature.
Check if:
- The profile photo appears correctly.
- The employee’s data has been filled in the signature fields.
- The image is the correct size.
- The signature is ready to be copied, sent, or deployed.
If the photo does not appear, check the points below:
- The user actually has a photo registered in Google Directory.
- The option to load the profile photo was checked during import.
- The photo placeholder was added to the signature template.
- The profile photo permission allows the image to be viewed.
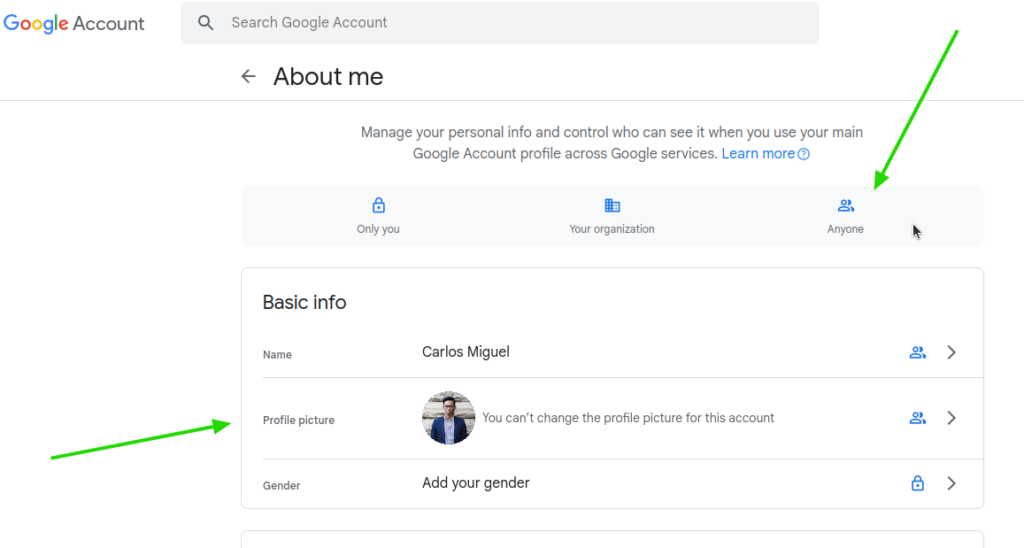
Profile photo permission
In the Google user profile, it is possible to control which information is shared publicly. This includes the profile photo.
If the photo has restricted visibility, Bybrand may not be able to import the image into the email signature. In this case, the employee will be imported, but the headshot may appear empty in the final result.
To allow the photo to load correctly, the image setting must be available to Anyone.
Example:
To verify this setting, access the user’s account and follow this path:
- Open the user’s Google Account.
- Go to Data & privacy.
- Look for the Info you can share with others section.
- Click on Profile.
- Check the option related to the profile photo.
- Adjust the visibility to Anyone when necessary.
After changing the permission, return to Bybrand and re-import the employees or update the automation group data.
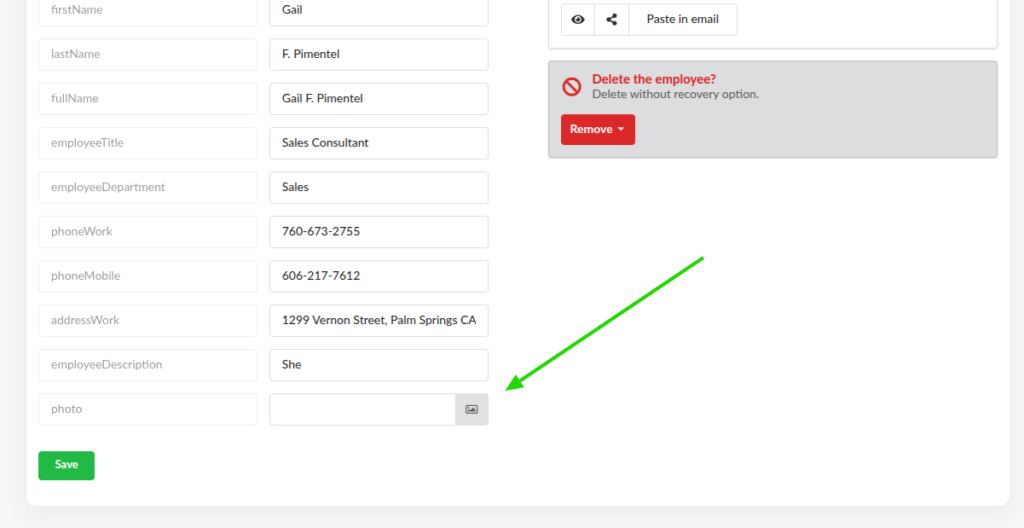
Adding the photo manually
If some users do not have a photo available in Google Directory, or if the image cannot be loaded automatically, you can also add the photo manually in Bybrand.
To do this:
- Access the group in Automation.
- Open the employee list.
- Click to edit the desired employee.
- Locate the field related to the photo, such as
{{photo}}. - Add the image URL or select an image from the gallery, if available.
- Save the changes.
After that, view the signature again to confirm if the photo was displayed correctly.