
This post is also available in:
You can associate your own custom HTML for an automation. Then edit the code and add the placeholders to be updated with employee information.
We’ll do all the steps to paste, edit, and update email signatures from HTML code. Many people refer to the term as an editor in HTML mode.
Video tutorial:
Before you start
The HTML edit mode is perfect for experts who master HTML. Here are the considerations you should read before using the feature.
- An email signature does not accept JavaScript;
- The CSS code must be in inline mode, not embedded;
- Only content within the HTML body tag is loaded;
- Not all CSS properties are supported, details in Campaign Monitor or Mailchimp;
How do I get the HTML version of an email signature?
Creating an HTML signature from scratch can be too complex. In this way, there are some options for you to get a complete HTML code and make your edits advanced. And simple logic like “IF-ELSE”.
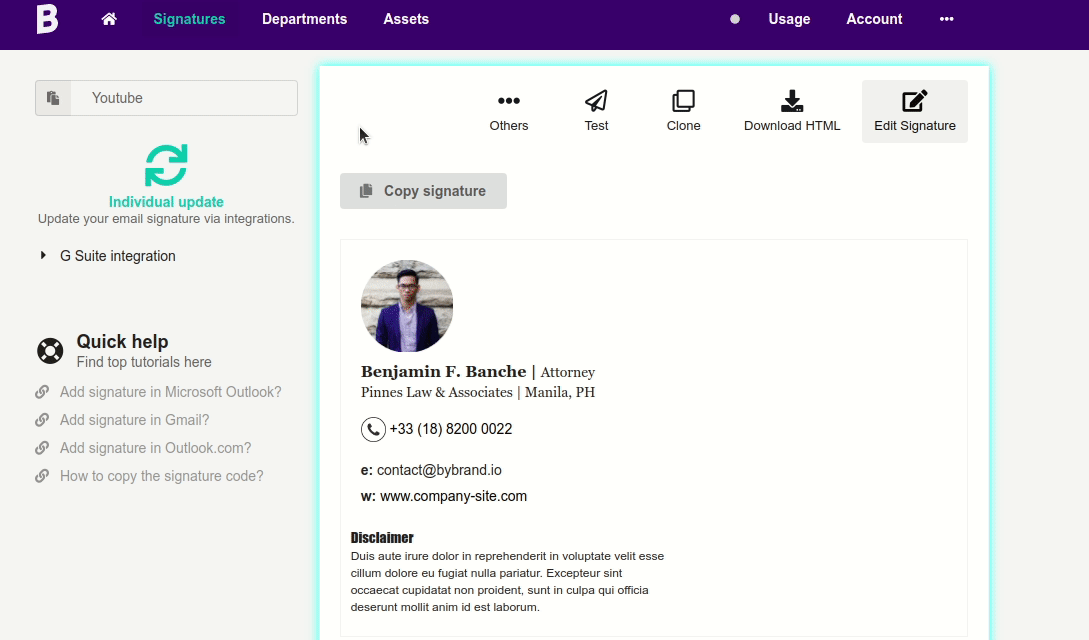
1. Download HTML signature from Bybrand
If you already have an email signature created at Bybrand, you can download the HTML and then make edits in the advanced mode in automation.
- Bybrand, menu Signatures – Paste in email – Download.
2. Create one from scratch using an HTML editor
If you are a web designer, or if your company has a professional with these skills, you will probably want to use this option. Creating your own signature using an IDE like WebStorm, Notepad ++, or Sublime Text.
3. Buy a ready email signature
Some freelancers create personalized email signatures, and these ready-made templates can be found on Fiverr or Gemini. So, copy the signature code and paste it into the HTML editor area.
Please note that we are unable to support third-party HTML.
Edit the HTML version of the signature
The tutorial steps start here.
Let’s assume that you already have an automation created. Then remove the current signature from the automation so that you can associate another one.
- Automation – menu Signature – Remove.
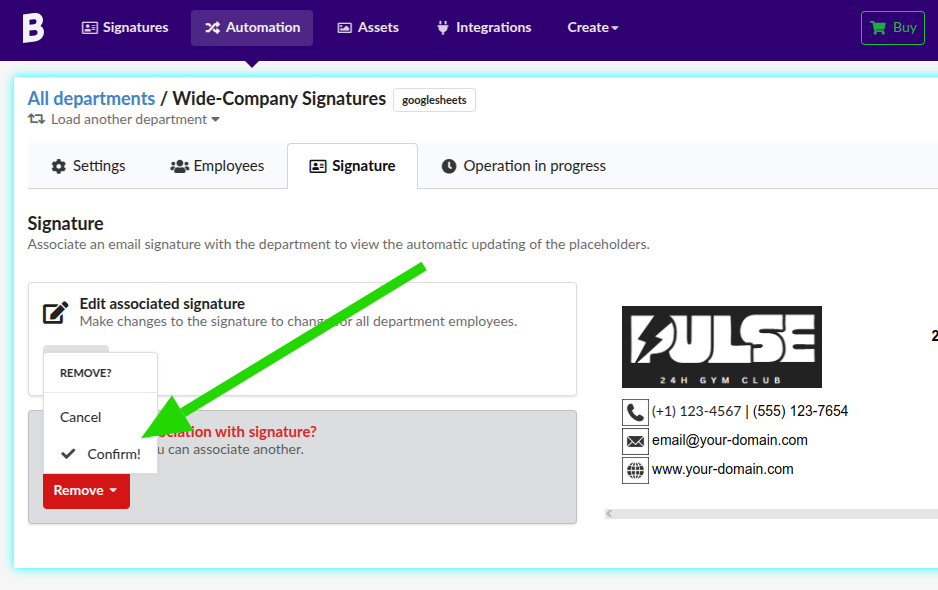
When removing, you will have the option to associate another email signature in the automation.
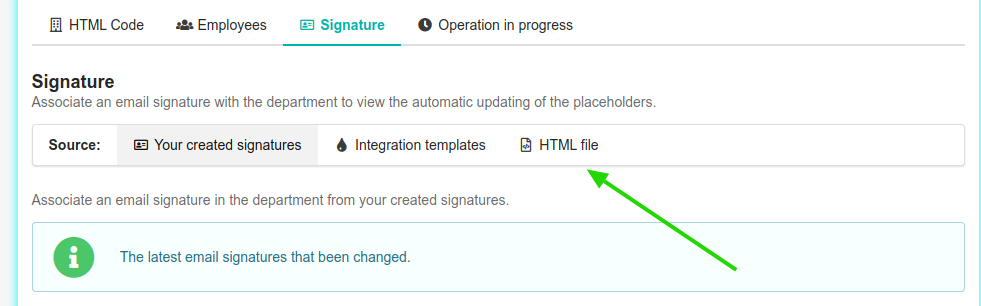
Choose the HTML File option, as illustrated by the illustration below.
Click the Edit in code button to create a signature for the automation with an HTML option.
Start typing your HTML code in the available text field.
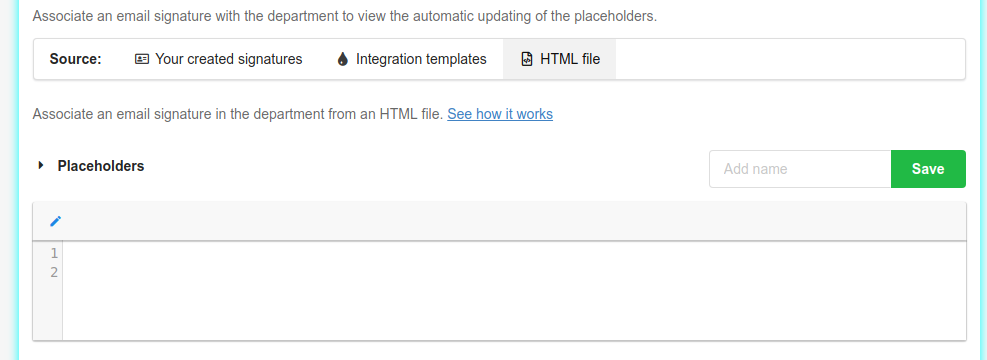
When you’re ready, click Save.
It’s a good idea to set a name for the email signature, so you can refer to it later.
Option the Code View
Optionally, you can create in Code View option, to see the rendered HTML.

In this part, you can also make simple editions, and change images from the gallery. You can also select text to point in the HTML to where it is located.
- Perform simple editing on the signature;
- Change images and icons;
- Find text inside the HTML;
Placeholders
If your HTML does not contain the automation placeholders, the email signature will not automatically update with each employee’s information when you click to view the signature on the Employees tab.
In this way, you need to add placeholders. To help, we’ve listed the fields in the option.
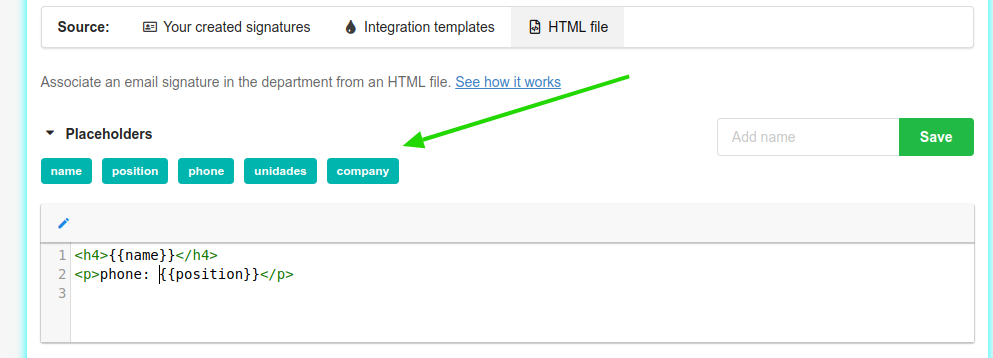
You can do a test using the example above, with two simple lines of HTML. You will notice that each employee’s information is updated with each interaction.
<h4>{{name}}</h4>
<p>phone: {{position}}</p>
Consider that your automation has the name and position placeholders.
Note: The option to Save changes is enabled only when you view the code. (Clicking in the View Code mode)
Quick video tutorial:
Removing the signature with own HTML
Bybrand saves signatures in HTML mode that are associated with an automation. And these can be viewed in the Signatures section, by accessing the Own HTML menu.