
This post is also available in:
Creating a custom email signature via your HTML is usually the preferred option, regardless of whether you have purchased pre-created code from an in-house designer, purchased it from a platform like Fiverr, or created it yourself using an IDE.
With HTML, you can customize your signature with fine details, from custom fonts, colors, and links to externally hosted images.
Therefore, this tutorial will walk you through the steps of creating a signature using proper HTML.
Before you start
The HTML editing mode is ideal for those who are proficient in the programming language. Here are the considerations you should read before using the feature.
- An email signature does not accept JavaScript;
- The CSS code must be in inline mode, not embedded;
- Only content within the HTML body tag is loaded;
- Not all CSS properties are supported; details in Campaign Monitor or Mailchimp;
Video tutorial
Here’s a video tutorial complete with all the steps above, showing steps to create an email signature using your own HTML.
Also watch: How to convert image-only email signatures to HTML using Gemini.
First signature with own HTML
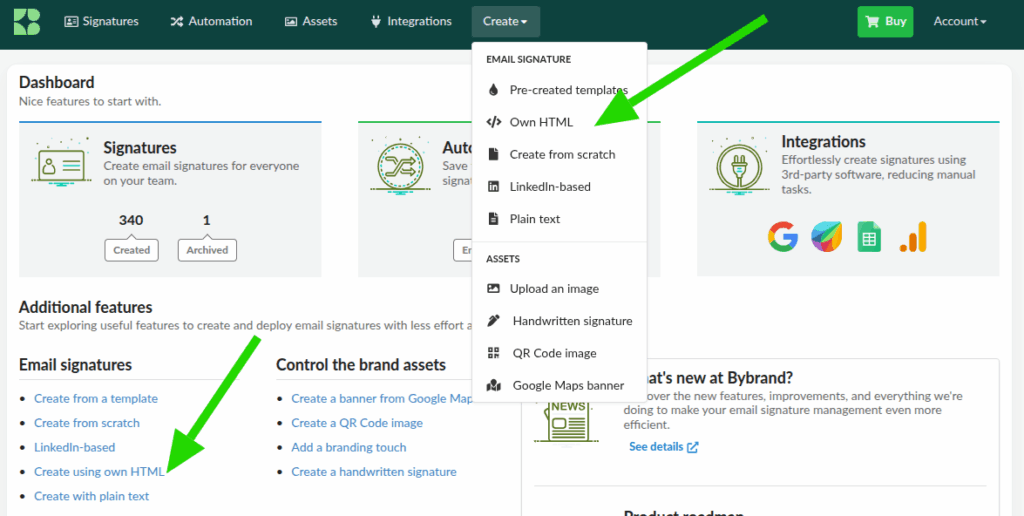
After logging into Bybrand, navigate to the Signatures menu, and click the Create new signature button. Here you will find the template gallery, click on the Own HTML option to get started.
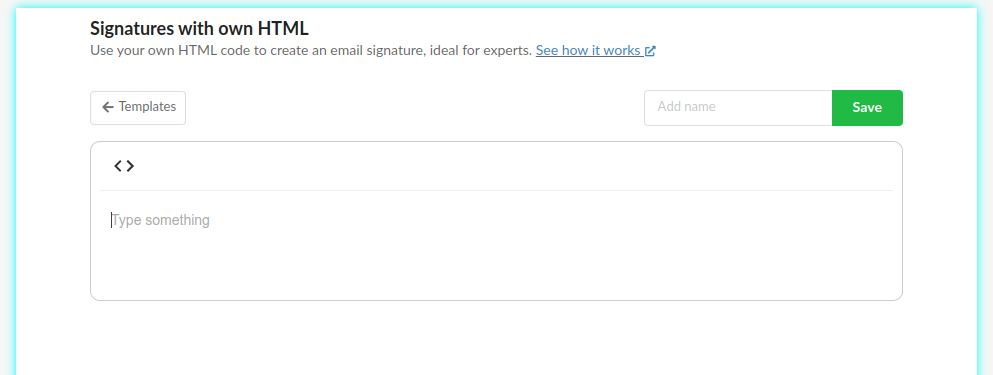
When you click on the option, you will be redirected to the creation page. Use your HTML from an already created signature, or start from scratch in the editor.
Example of HTML editor:
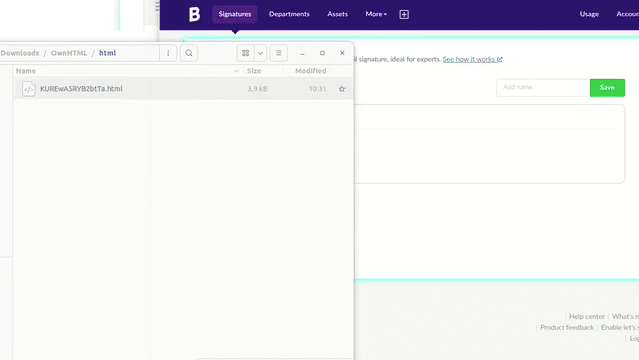
You can move a complete HTML file into the editor.
Note that when saving the signature, the editor will style the code to make it readable, and remove properties not allowed in HTML, such as embedded JavaScript or CSS.
Option Code View
Optionally, you can create it in Code View, to see the rendered HTML.

Here you can also make edits , and change images from the gallery. You can also select text to point in the HTML where it is located.
- Perform simple editing on the signature;
- Change images and icons;
- Find text inside the HTML;
Note that the save button is disabled in Code View mode, so you need to switch to HTML and thus enable the save option.