
This post is also available in:
The Automation feature makes it easy to create and manage standardized email signatures for entire teams. By using placeholders, you guarantee consistency, time savings, and automatic personalization with each employee’s data.
Watch a video with:
1) Creating your first automation
Start by defining the group of employees you want to manage. For example, you could create an automation called “Sales Team” to cover the entire sales team.
- Navigate to the Automation menu.
- Click on Create group.
- Enter a name for your automation, such as “Sales Team”.
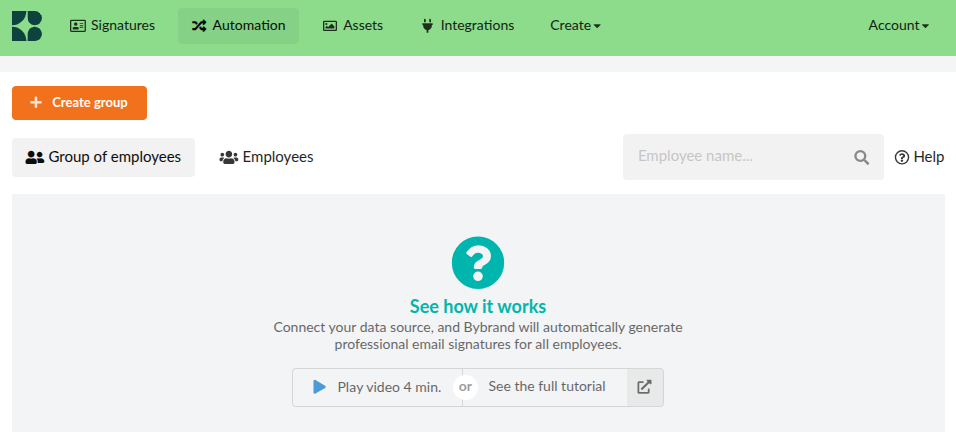
💡 Consider the automation to be a “group of employees” who will share the same signature.
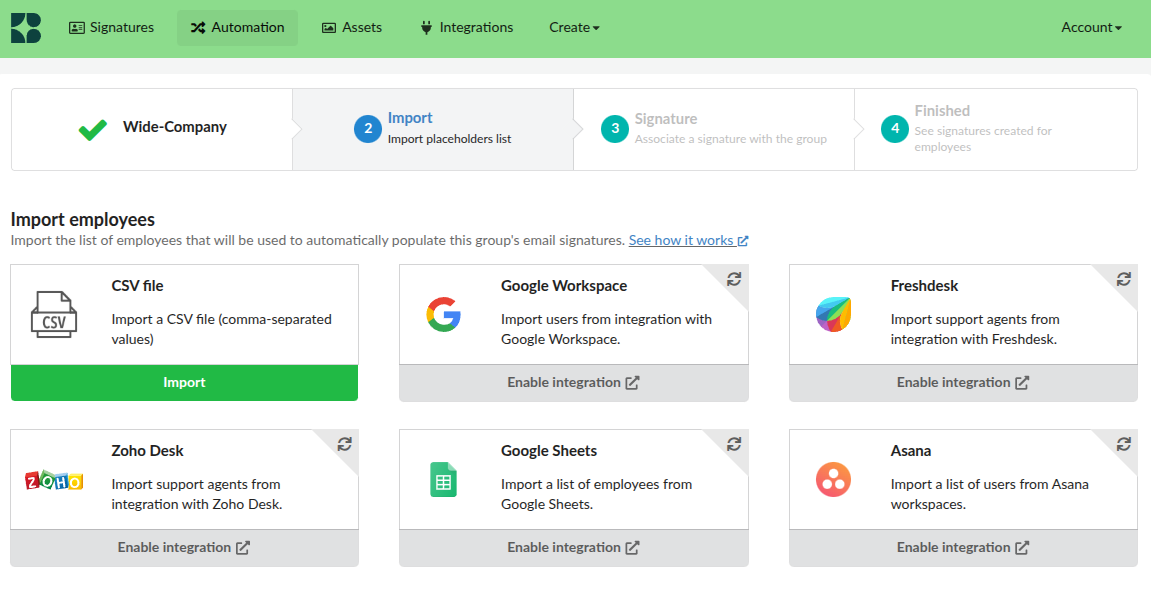
2) Importing employees
You can add employees in two ways:
a) CSV file
- Create a CSV file in UTF-8 with the necessary fields, such as
name,job title,phone number,emailaddress. - The first line should contain the headers (placeholders).
- Upload the file in Import Employees.
- Review the data in the preview and confirm.
b) Integrations
Connect directly with Google Workspace, Zoho CRM, or other compatible platforms. The data will be imported automatically, ready to generate signatures.
3) Importing an employee CSV file
Next, import your employee list into the automation. This can be done using a CSV (comma-separated values) file, which you can easily create using spreadsheet software.
- Prepare a CSV file with headers corresponding to the placeholders you will use (e.g., name, job title, phone number, e-mail address).
- In the automation, select the “Import employees” option.
- Upload your CSV file.
Make sure your CSV file is formatted correctly. The first line should contain the headers (placeholders), and the subsequent lines should contain the corresponding employee data.
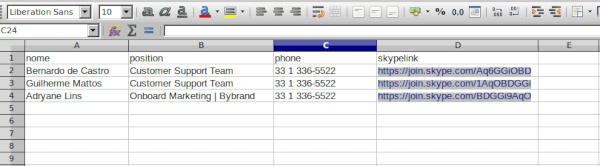
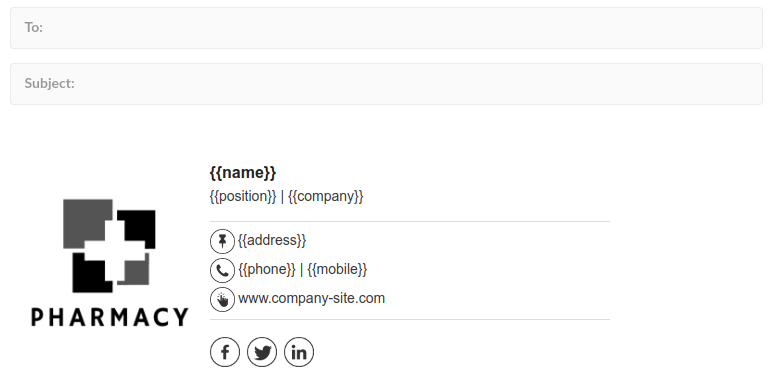
The placeholders in this example are “fullName”, “email”, “position,” “phone” and “linkedinProfile”.
After sending the file, Bybrand will display a preview of the imported employees. Review the information and click Confirm and Continue to proceed.
A more comprehensive tutorial for CSV can be found here.
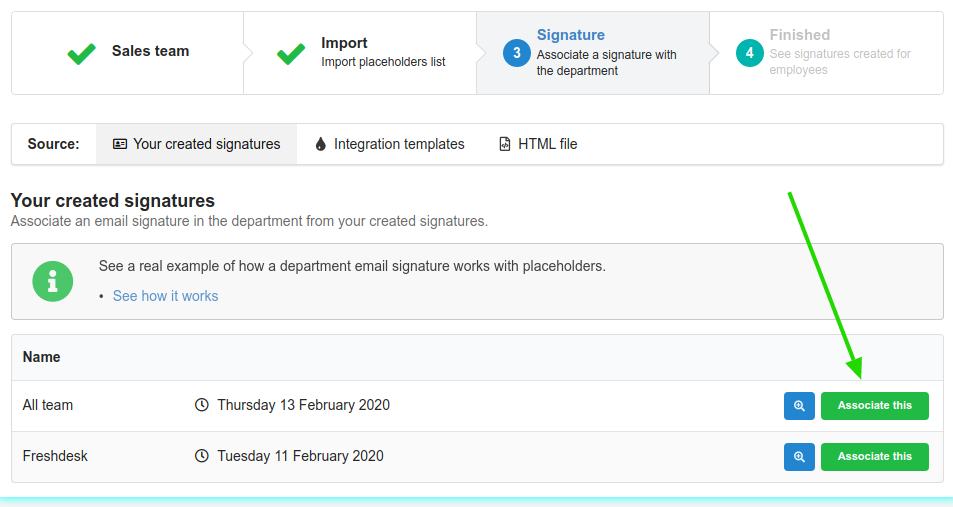
4) Associating an email signature
Now associate a standard email signature with the group. This signature will useplaceholders,s which will be replaced by the employee’s actual data.
- Navigate to the Signatures tab.
- Create a new signature or select an existing one.
- Incorporate placeholders into the signature where appropriate (e.g.,
{{name}},{{position}},{{phone}}).
Associating a signature:
Placeholder guidelines
The dynamic signatures are created using “placeholders” to be replaced with real data of the employees.
{{key}}
- Placeholders should be enclosed in double curly braces, like
{{name}}. - Avoid using dots or spaces in placeholder names. For example, use
{{employeeName}}instead of{{employee.name}}.
Here is an example:
Once your signature is ready, associate it with the automation. You’ll receive a confirmation message upon successful association.
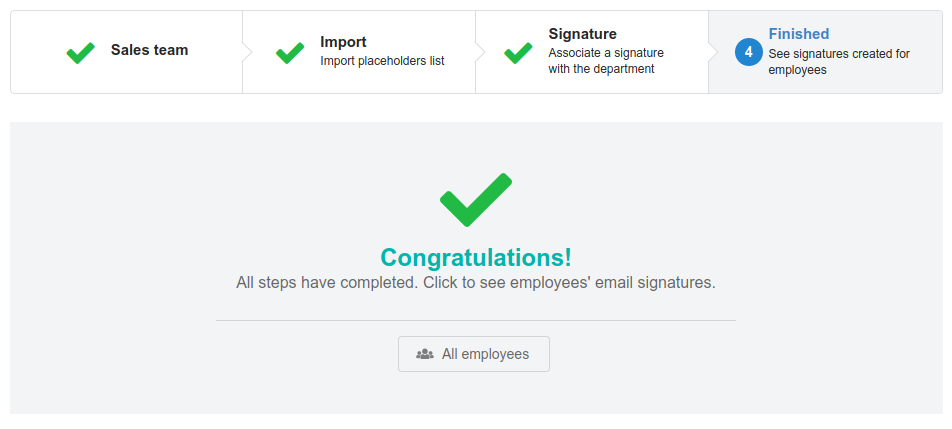
After you associate an email signature, you will present the success message with the fourth step. Then click the employee’s button to view the email signatures created.
4) Viewing employees
With the signature associated, you can now view and manage individual employee signatures:
- Go to the Employees section within your automation.
- Click on an employee’s name to view their personalized signature.
- From there, you can copy, email or paste directly into email services such as Gmail or Outlook.
Tips for effective use
Placeholders can be used for both text and hyperlinks. For example, {{twitterLink}} can be used to insert a personalized Twitter URL.
- Utilize the Bulk Action feature to send signature deployment instructions to multiple employees simultaneously.
- Integrate with platforms like Google Workspace and Freshdesk for seamless signature deployment.
Additional resources
- How to send a signature to an employee.
- How to create a dynamic email signature.
- Automation: how to add a dynamic URL in the email signature.
If you need any clarifications or difficulties, please contact our support team.