
This post is also available in:
In this complete guide, we will explore all the tools and features of the Bybrand editor so that you can create a personalized and impactful signature.
Video with all options:
Activating the editor
Start by clicking on a cell of your signature. Note how the cell is highlighted when you hover over it.

- Click on the cell or line to open the menu.
- Use the More (+) icon to add new elements, such as a title, simple text, line, space, inner columns, legal notice, footer, or header.
- Combine these elements to create the basic structure of your signature.
Customization
Explore the customization options:
- Plus (+) icon as seen above.
- Delete: Remove unwanted elements with the trash can button.
- Images: Insert logos, photos, or other images to give a visual touch to your signature.
- Click on the image icon to open the gallery or upload your own image.
- Duplicate: Create copies of elements to accelerate the creation process.
- Select element: Click on a line of text to select all the text content.
- Special paste: You can move entire items to another position, preserving their attributes — see how it works.
- Major settings: This function applies changes to the entire scope of the signature quickly – See details.
- Quick change: Edit the text of the entire signature at once after saving.
- Column width: Resize the main column width in three predefined options.
Text formatting
Select a text element to access the formatting tools:

Example in the editor when selecting text in the email signature.
- Bold: Highlight important words.
- Italic: Give a touch of elegance to your signature.
- Font: Choose the font that best suits your style.
- Font Size: Adjust the size for easier reading.
- Line Height: Control the spacing between lines of text.
- Text Color: Match your brand’s color palette.
- Background Color: Create a contrast with the text color.
- Links: Add links to websites, social networks, documents, and more:
- Select the text and click on the link icon.
- Insert the link address and customize the link color and behavior.
Layout and alignment
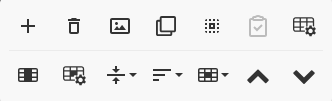
Continuing with the options on the bottom row, the second line contains the items:
- Columns: Divide your signature into columns to organize the information.
- Use the “Split Column” button to adjust the width of each column. See how it works.
- Cell properties:
- Background color: Change the background color of each cell.
- Padding: Control the spacing between the text and the column borders.
- Alignment: Align the text vertically (top, center, bottom) and horizontally (left, center, right) for a professional look.
Borders
Customize the borders of your signature:
- Click on the “Manage borders” button to see on which sides the border is active.
- Adjust the border width and color.
- Remove the border with the trash can icon.
- Change the border style for a unique touch.
- Apply borders to individual cells, inner columns, or the entire signature.
Extra tips:
- Use your brand’s color palette to maintain visual consistency — see best practices.
- Include your contact information clearly.
- Keep the signature concise and avoid unnecessary information.
- Test the signature on different email clients to ensure correct viewing.