
This post is also available in:
This tutorial shows how to connect Microsoft Entra to Bybrand, import users from your corporate directory into an Automation group, and then deploy the Bybrand Outlook add-in in your organization.
With this integration, you can sync Microsoft Entra users, generate dynamic email signatures using employee data, and automatically make those signatures available in Outlook.
Full video tutorial:
Before you begin
Before starting, make sure you have:
- An administrator account in Bybrand
- Administrator permissions in Microsoft 365 / Microsoft Entra
- Access to the Microsoft 365 admin center
- An email signature created in Bybrand to be used in Automation
Then, let’s get started.
Installing the Microsoft Entra ID integration
In this first step, you will connect your Microsoft Entra account to Bybrand. This connection allows Bybrand to read users from your corporate directory and use that data to generate dynamic email signatures.
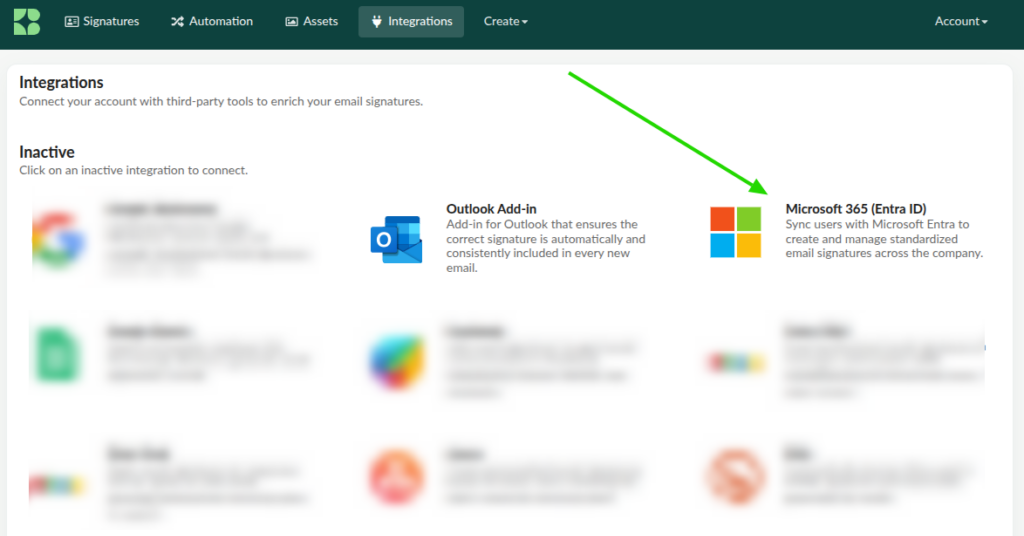
Accessing the integrations area
- Log in to your Bybrand account
- In the top menu, click Integrations
- Locate the Microsoft Entra integration
Example:
- Navigate to the Manage tab
- Click Install
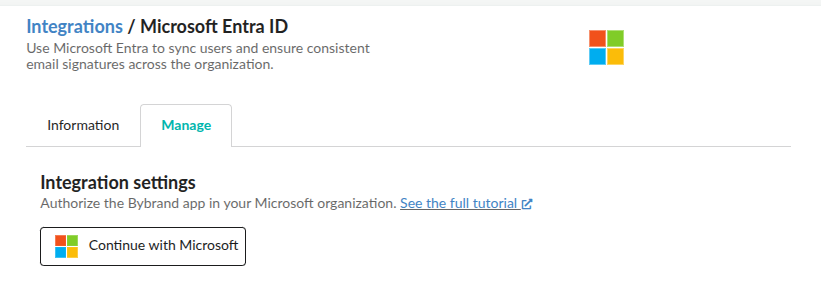
Authorizing the connection with Microsoft
After clicking install, you will be redirected to Microsoft’s authentication screen.
- Sign in with a Microsoft 365 administrator account
- Review the requested permissions
- Click Accept to authorize the connection
- Wait to be redirected back to Bybrand
After authorization, the integration will appear as connected in your Bybrand account.
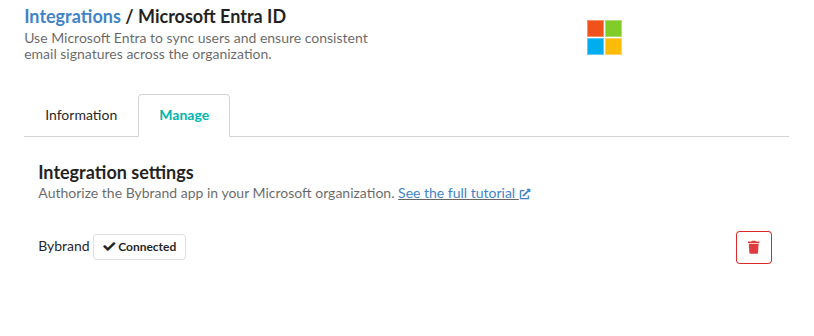
Verifying the integration
Return to the integrations area in Bybrand.
The Microsoft Entra integration should appear as active (along with the Outlook Add-in integration). From this point, you can use directory data to import users into an Automation group.
Importing users from Microsoft Entra ID (in Automation)
Now that the integration is active, the next step is to create an Automation group. This group will be used to import employees from Microsoft Entra and generate personalized signatures for each user.
Automation is used to quickly create and manage email signatures for employees using placeholders that are replaced with each person’s actual data.
Creating a new group
- In the main Bybrand menu, click Automation, then click Create group
- Set a name for the group
Example:
Microsoft Entra – Employees
Or, if you prefer to segment by team:
Sales Team—Microsoft Entra
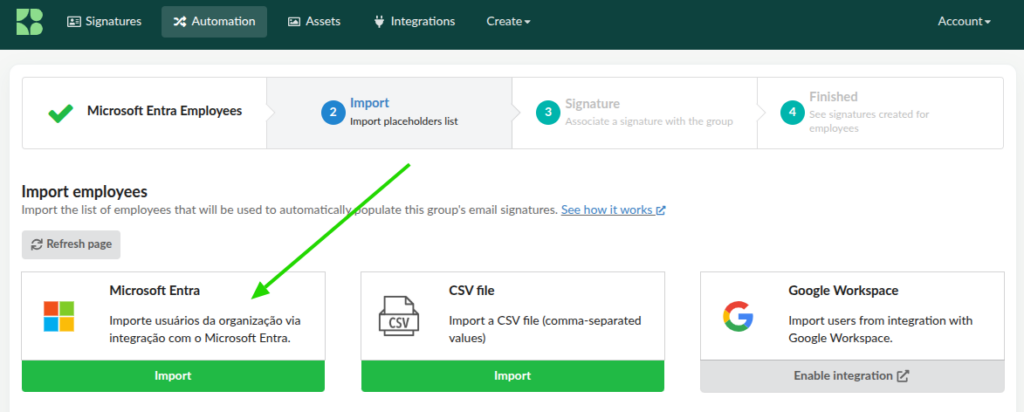
Importing users from Microsoft Entra
During the import step, select Microsoft Entra as the data source.
- Choose Microsoft Entra from the list of import options
- Click to import available users
In the import section, you can import a list of users or groups.
- Review the list of employees
- Select the users you want to import
- Click Import selected.
Bybrand will import key user data such as name, email, job title, and other available directory attributes.
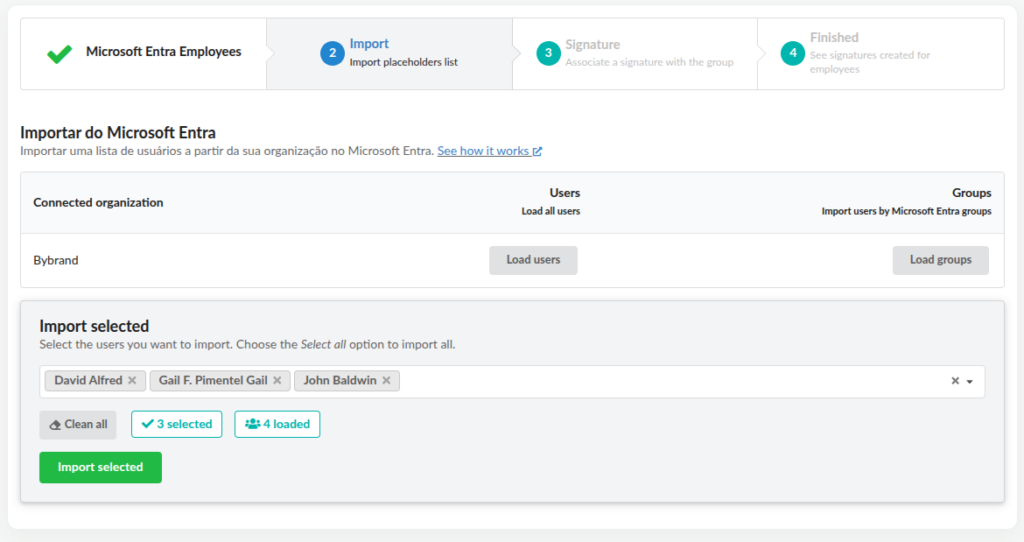
After the import, employees will appear inside the Automation group.
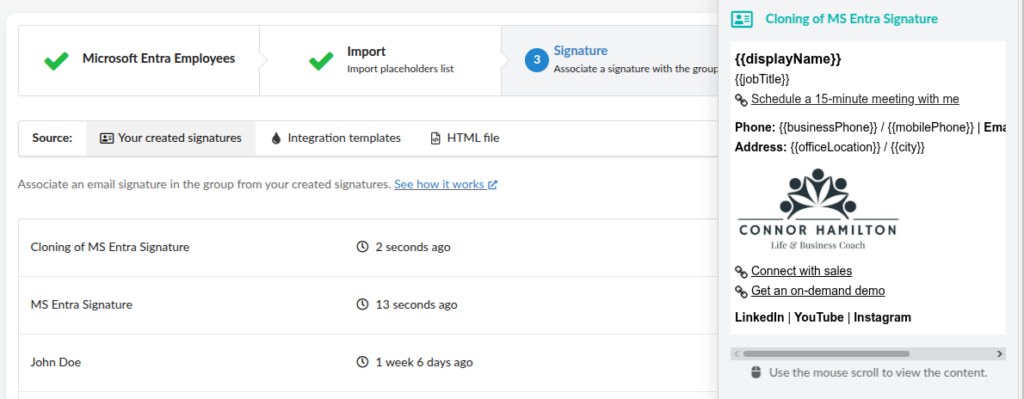
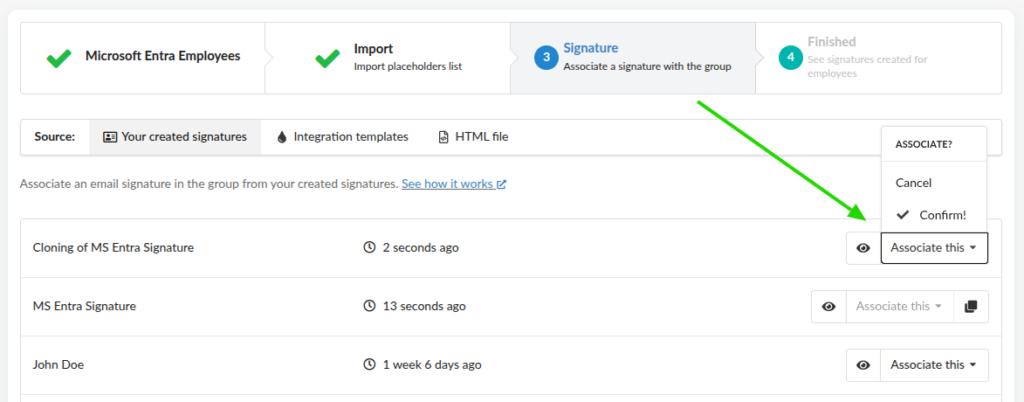
Assigning a signature to the group
After importing users, assign an email signature to the group. Choose an existing signature, a pre-created one, or create a new one.
The signature should use placeholders such as:
{{displayName}}
{{email}}
{{jobTitle}}
{{businessPhone}}
These fields will be automatically replaced with each employee’s data from Microsoft Entra.
Confirm the signature assignment to the group.
See also: How dynamic email signatures work.
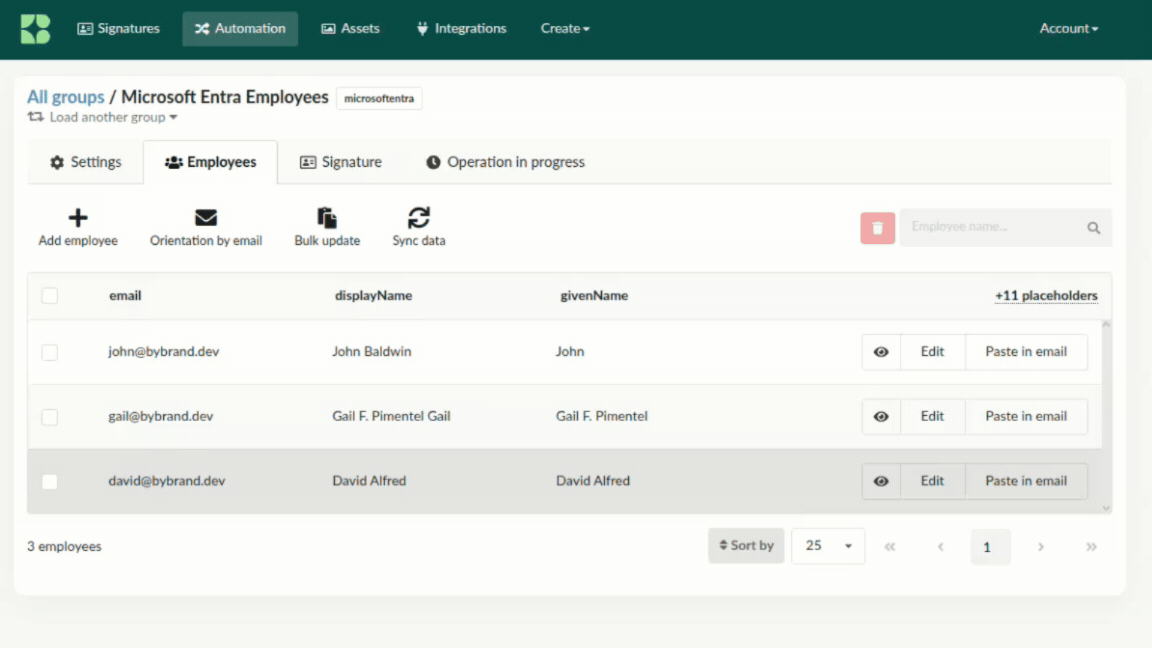
Viewing created signatures
After assigning the signature:
- Go to the employee list
- Click on an employee
- Preview the generated signature
- Confirm the data is correct
Repeat this check for a few users before proceeding to Outlook deployment.
Deploying the Outlook add-in in your organization
With users imported and dynamic signatures generated, the final step is to deploy the Bybrand Outlook add-in in your Microsoft 365 organization.
This component allows the company’s official signature to be automatically inserted when users compose a new email in Outlook. Deployment can be done for the entire organization or for specific groups in the Microsoft 365 admin center.
Full video: How to deploy the Bybrand Outlook add-in
Downloading the manifest.xml file
Before accessing the Microsoft 365 admin center, download the manifest.xml file from Bybrand.
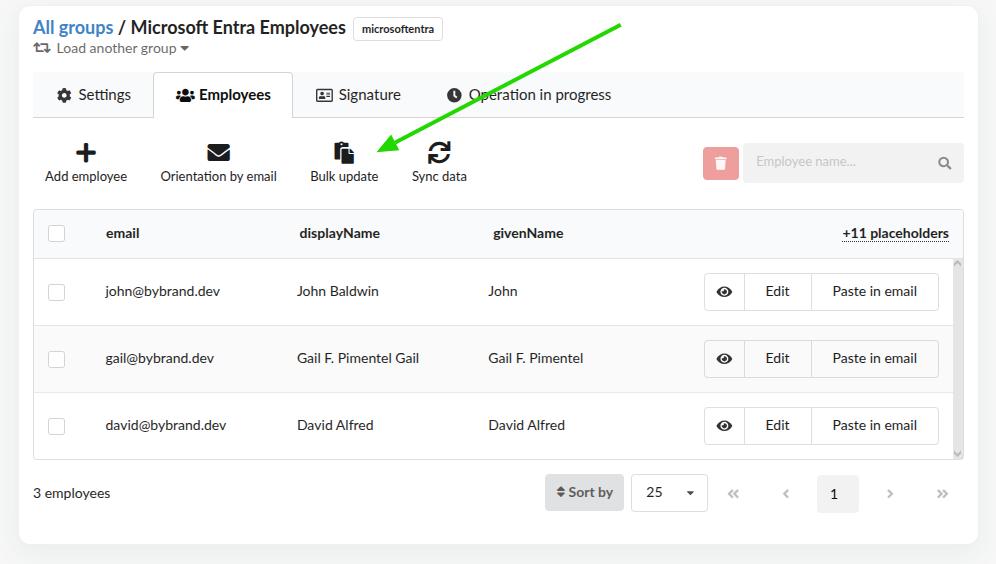
- In the group, access Bulk update, or go directly to the Outlook Add-in integration
- Locate the option to download the
manifest.xmlfile - Save the file to your computer
Accessing the Microsoft 365 admin center
- Log in to the Microsoft 365 admin center with an administrator account
- In the left menu, click Show all if needed
- Go to Settings
- Click Integrated apps
- Click Upload custom app or Deploy custom app
Uploading the manifest.xml
- Choose the option to upload a custom app
- Select the
manifest.xmlfile downloaded from Bybrand - Click Validate or proceed with automatic validation
- Continue to the next step
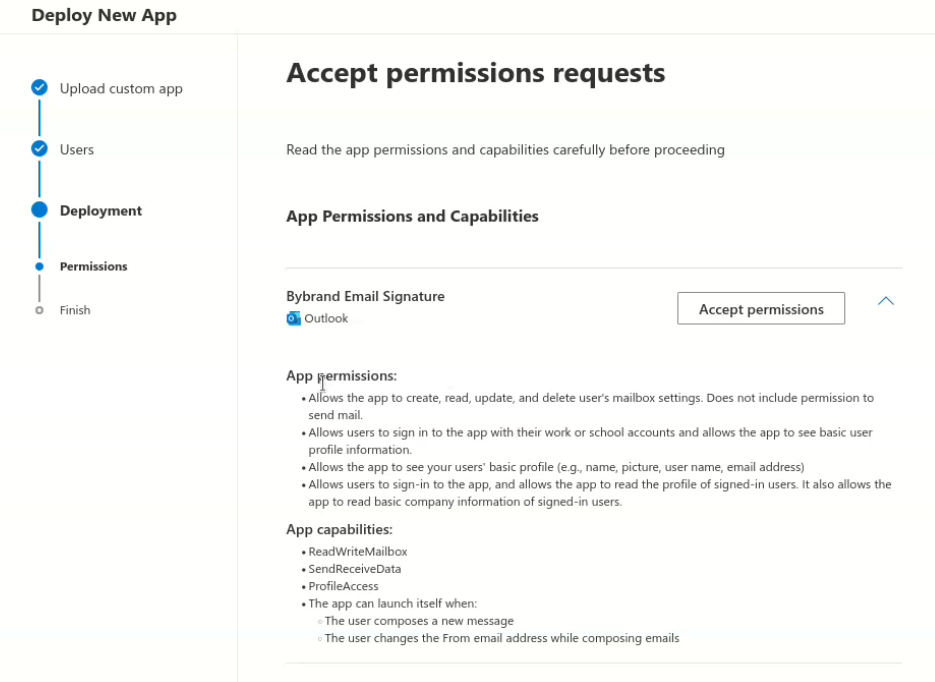
If the manifest is validated successfully, you can choose who will have access to the add-in.

Choosing deployment users
In this step, choose whether the add-in will be installed for:
- The entire organization; or
- Specific users or groups
For an initial rollout, it’s recommended to start with a smaller test group and expand later.
- Select the deployment scope
- Review permissions
- Accept the required permissions
- Click Finish deployment
Verifying the deployment in Outlook
After deployment, the Bybrand add-in will be available in Outlook for selected users.
Propagation may take up to 72 hours depending on Microsoft 365.
To test:
- Open Outlook
- Click New email
- Check if the default signature is automatically loaded
- Open the Bybrand Email Signature add-in
- Confirm that available signatures appear in the side panel
When composing a new message, the official signature can be automatically inserted, and users can also select another signature from the side panel.
Read more: How the Outlook add-in works
Final result
After completing these steps:
- Bybrand will be connected to Microsoft Entra
- Users will be imported into an Automation group
- The Outlook add-in will be deployed in your Microsoft 365 organization
From this point on, employees will be able to compose emails in Outlook with the official company email signature, automatically generated using Microsoft Entra data.
Tips and troubleshooting
Microsoft Entra integration is not connected
Make sure the authorization was completed using a Microsoft 365 admin account. If necessary, remove the integration and reconnect it.
Users do not appear during import
Confirm that the account used for authorization has permission to read users from Microsoft Entra. Also verify that there are active users in the directory.
Signature does not appear for a user in Outlook
Remember that propagation can take up to 72 hours.
Also check:
- The user was imported into the Automation group
- A signature was assigned to the group
- The user’s email in Bybrand matches the Outlook account
- The add-in was deployed for that user in Microsoft 365
Add-in does not appear in Outlook
Check for other possible issues with the Outlook add-in here.