
This post is also available in:
Deploying signatures allows you to add employee email signatures directly to the integrated service, such as Google Workspace, without the need to manually insert them into each account.
You can deploy signatures manually for selected employees or set up an automatic deployment.
Before you begin
- Access an automation group with the employees and the signature you want to deploy.
- Check if the integration is connected and linked to the group.
- Ensure that employee data and the signature template are correct.
Manual deployment is available for compatible integrations such as Google Workspace, Freshdesk, and Zoho CRM. The following automatic deployment instructions refer to Google Workspace for applying signatures to Gmail accounts.
How to access signature deployment
- In the main menu, go to Automation and open the desired group.
- Go to the Employees tab.
- Click Deploy signatures, above the employee list.
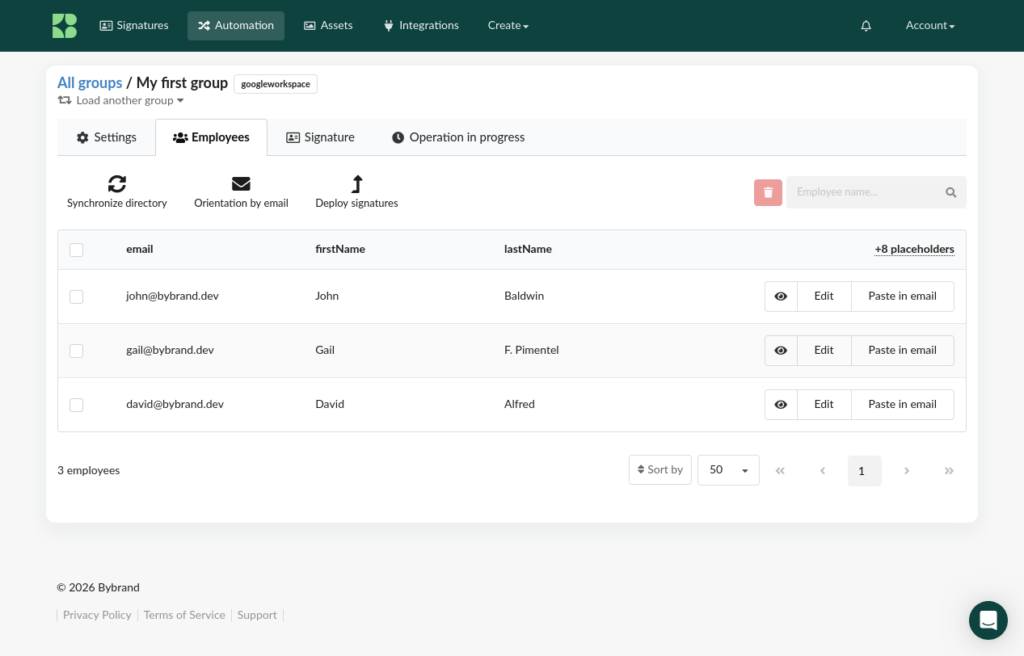
On the Apply email signatures screen, you will find two tabs:
- Manually: to deploy signatures for selected employees.
- Scheduled: to set up and track automatic deployment.
Deploy signatures manually
Use this option when you want to apply a change without waiting for the next automatic run, such as an update to the signature template or an employee’s data.
- On the Apply email signatures screen, open the Manual tab.
- In the Employees field, search for and select the employees who should receive the signature. Or, to apply the signature to all employees in the group, use the Select all option in the list.
- Check the number of selected employees.
- Click the Deploy signature to start the deployment.
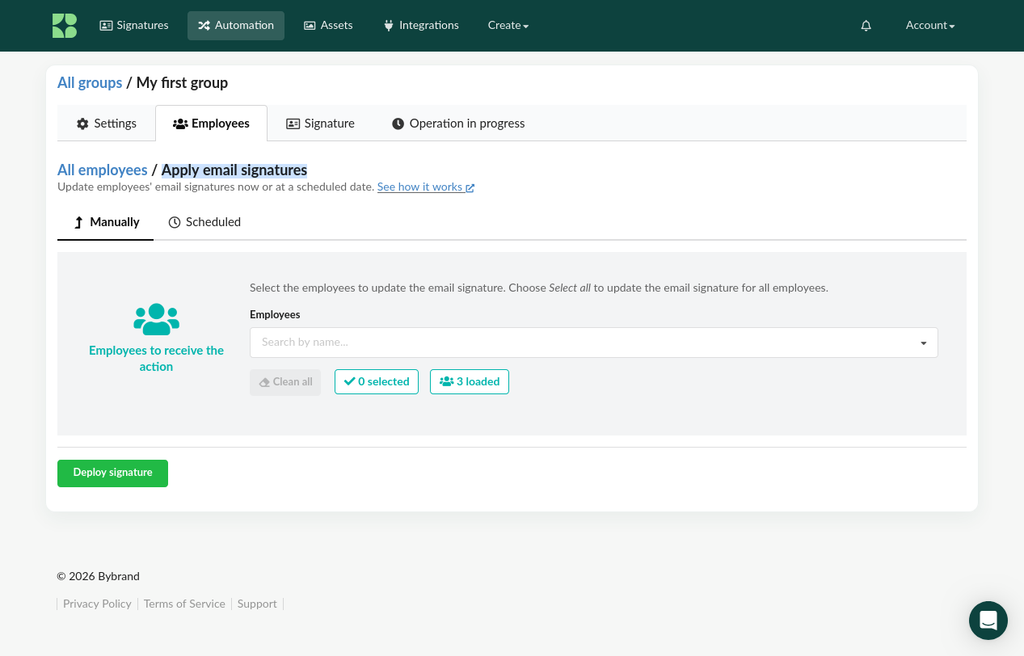
After starting the deployment, go to the Operations in progress tab to track the processing and view success or failure logs.
Set up scheduled deployment
Automatic deployment keeps account signatures updated according to the configured frequency, without you needing to start each deployment manually.
Deployment works for Gmail. Other integrations like Zoho CRM and Freshdesk are coming soon.
- On the Apply email signatures screen, open the Scheduled tab.
- In the Automatic deployment panel, activate the Schedule state toggle.
- Under Frequency, select the desired frequency from the available options. In the images for this tutorial, the selected option is Daily.
- Click Save to save the configuration.
- Check the schedule status and next run information in the panel.
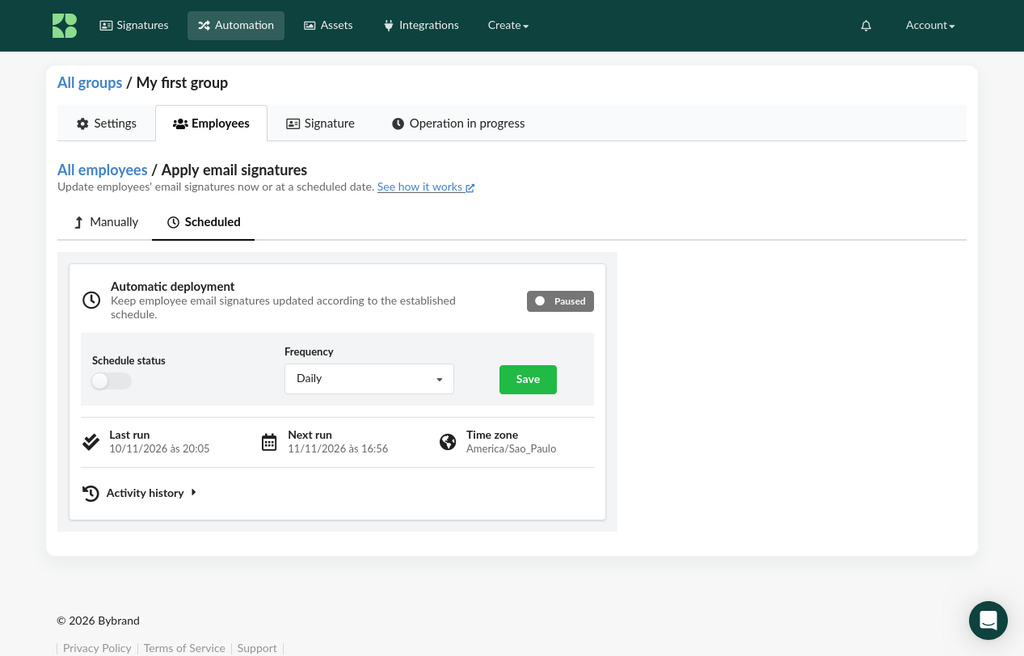
The image above shows the schedule paused, identified as Paused. When the schedule is active, the panel displays Active.
View schedule information
Below the settings, the panel displays:
- Last run: date and time of the last execution.
- Next run: date and time of the next execution indicated by the system.
- Time zone: the time zone used to display schedule information. In the example, the zone is America/Sao_Paulo.
Change frequency or pause the schedule
To change the frequency, choose another option under Frequency and click Save.
To pause automatic deployment, deactivate the Schedule state and save.
Track automatic deployment history
In the Scheduled tab, click Activity history to expand the activity history.
Each record shows the execution time, the time for which it was scheduled, the result, the attempt, and the processing duration. Depending on the result, counts for verified, updated, or unchanged signatures are also displayed, along with an error message if a failure occurred.
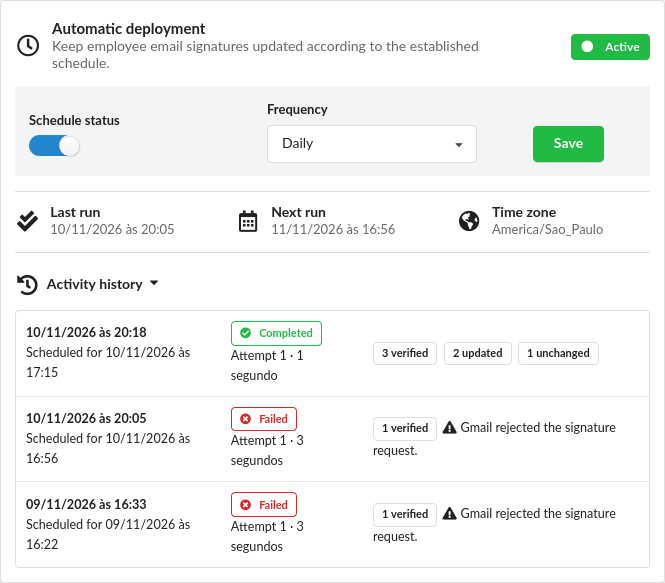
How to interpret results
- Completed: the execution was finished.
- Failed: the execution encountered a failure. Check the message displayed in the log.
- verified: number of signatures verified during the execution.
- updated: number of signatures updated.
- unchanged: number of signatures that remained unchanged.
In the example of a completed execution, the system verified three signatures: two were updated and one remained unchanged.
What to do if the integration is unlinked
If the integration is disconnected, you will need to link it to the group again before deploying signatures.
- Open the group settings and check for the integration or domain not connected warning.
- Use the Select link, indicated in the warning, to re-link the integration domain.
- Save the change.
- Return to Employees → Deploy signatures and try the deployment again.
Individual or group deployment
To update only one account, you can also use the Paste to email action, available on the employee’s row.