
This post is also available in:
In this tutorial, you will learn how to create email signatures with employee headshots using Bybrand and the information available in Microsoft Entra ID.
The profile photo can be imported automatically from the Microsoft Entra ID integration, provided the integration is already active in your Bybrand account.
Before you start
Check if:
- The Microsoft Entra ID integration is already installed in Bybrand.
- Employees already have a profile photo registered in Microsoft Entra ID.
- The email signature used in the group contains the correct placeholders, including the photo field.
- You have permission to import employee data through the integration.
Video tutorial
Watch the step-by-step video.
Steps
1. Access the Automation area
In the Bybrand dashboard, go to the Automation menu.
This area allows you to create employee groups and generate personalized signatures in bulk using data from Microsoft Entra ID.
Next, click to create a new group.
2. Import employees from Microsoft Entra ID
In the import step, select the Microsoft Entra ID integration. You can choose specific employees or import all available users.
To create signatures in bulk, select the option to import all employees.
3. Enable profile photo upload
During import, check the option “Upload each user’s profile photo.“
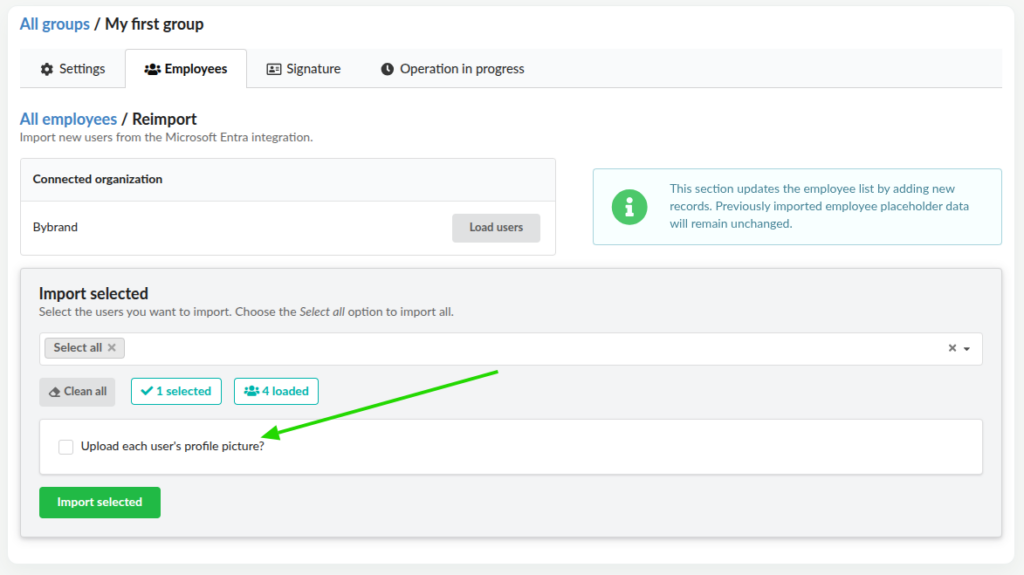
This option is essential for Bybrand to attempt to load each employee’s headshot directly from Microsoft Entra ID.
Without this selection, signatures can be created normally, but the profile photo will not be added automatically.
4. Connect a signature to the group
In the Signature step, connect an email signature to the employee group. You can choose an existing signature in your account, use a pre-created Bybrand template, or insert your own HTML.
Example of an email signature with a photo placeholder.
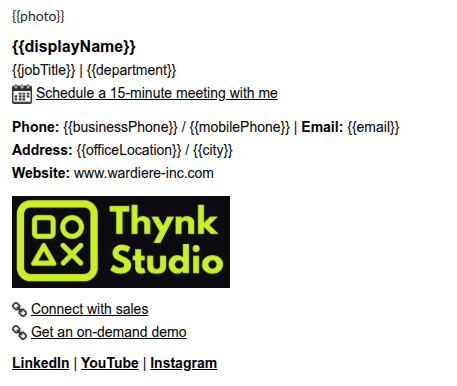
The most important point is that the signature must contain the placeholders from the Microsoft Entra ID integration. These fields are responsible for automatically pulling information such as name, title, phone, department, and profile photo.
4.1. Adding the photo placeholder
You need to add the {{photo}} placeholder if your HTML signature does not have the field.
On the editing screen, you will see the placeholders available for the Microsoft Entra ID integration. Locate the field related to {{photo}} and add it to the signature layout.
Take the opportunity to review spacing, alignment, and image size to keep the signature professional and well-organized.
5. Verify the result
In the employee list, check if the signatures were generated correctly.
If the photo does not appear, check the following points:
- The photo exists in the user’s profile in Microsoft Entra ID.
- The photo upload option was checked during import.
- The photo placeholder was added to the signature template.
Deploying the signature to the employee’s Outlook
After reviewing the generated HTML signatures, you can deploy them to the users’ Outlook.
To complete this, you must install the Bybrand component in the Microsoft 365 Admin Center. The related steps are available in the Bulk Update section.
- See also: Install the Bybrand component in Outlook
After deployment, employees will start using professional signatures with headshots when composing a new email.
Adding a profile photo manually
Some users without a photo: check if these users actually have a photo set in Microsoft Entra ID.
You can also edit the employee and add a photo directly from the gallery in the {{photo}} field.
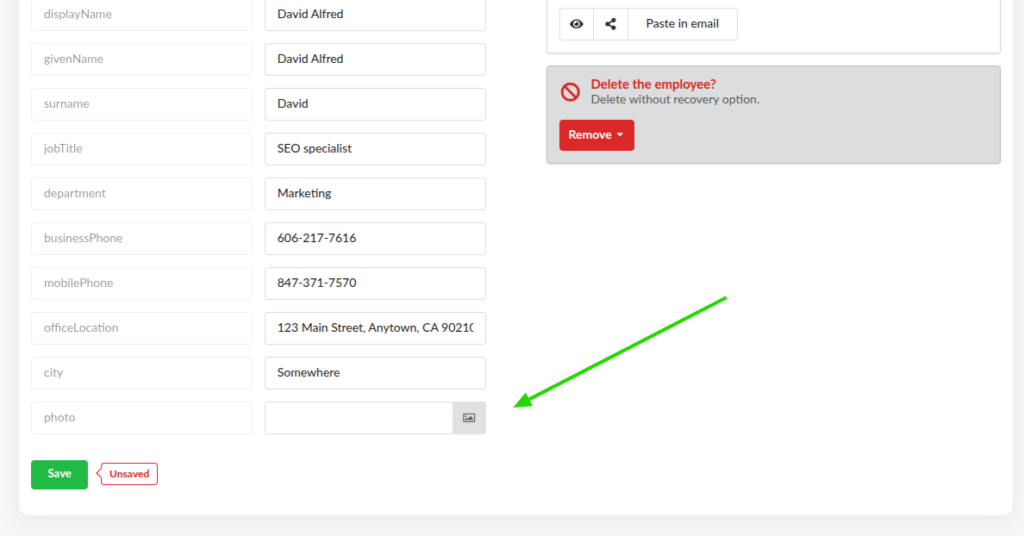
In the employee list, click Edit. And then, add the image URL.