
This post is also available in: Português
Yahoo! Mail is a free webmail client, with unlimited space and many languages. Integrated with social media and instant messages to start, it’s at the top of the list, and Microsoft and Google.
Due to a
Adding an email signature to Yahoo! mail
This article will go through a step-by-step tutorial on how to add an HTML signature created with the signature editor from Bybrand directly to Yahoo! Mail.
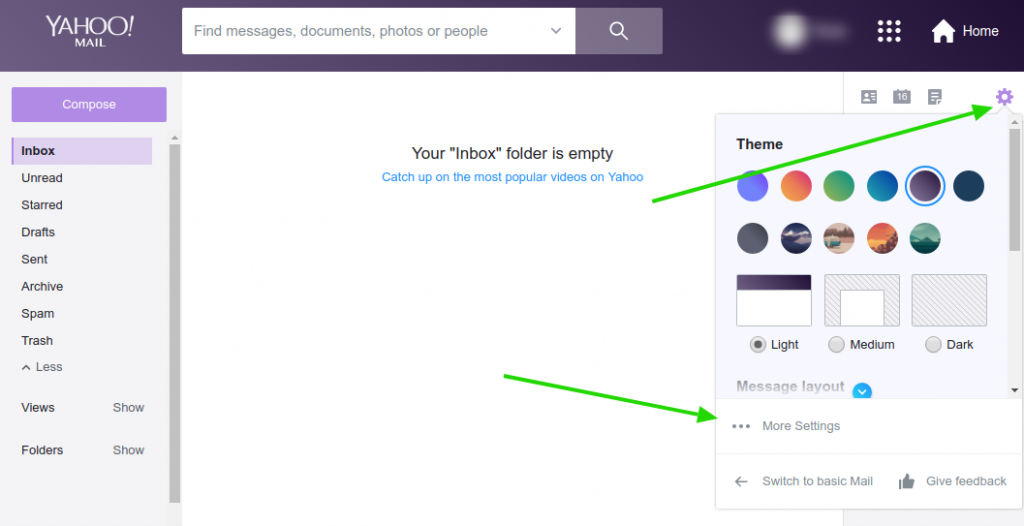
First, you need to log into your email account. Afterward, go to settings, as seen in the image below.
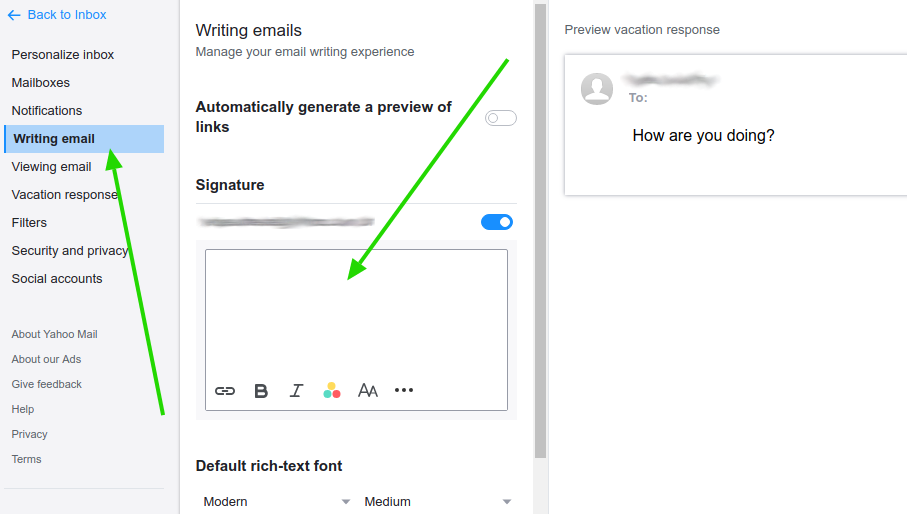
A window with options will open, click on the Writing Email tab and after that, view the email signature area. You must paste the content of the signature in it.
Here’s an example image:
A second alternative is at the Email account option, click your address that is shown in the list. Find the Signature section. It’s recommended to mark the option: Include a signature in sent emails.
Pasting the email signature
The second part of the tutorial is copying the email signature created with Bybrand and pasting it (Ctrl+V) in the text box, as you can see in the image shown above.
The signature will show perfectly! It’s possible to make changes at any moment. All you need to do is erase and paste the updated code.
To finish it all off, save it! The window will close, and your future messages will now have a beautiful signature.
Video tutorial
As promised, here’s a video showing the process above.
If you need any clarification or difficulties, please contact our support team.